Review Sumerian Alkaid 10 inch telescope
The reason for me to buy the Sumerian Alkaid 10 inch telescope is because opposed to my previous telescope (a Skywatcher 12″ flex tube), I wanted to be able to take it with me during air travel. The choice for a Newton was quickly made, because I think it just works wonderfully; easy set-up, quick collimation and a short cool down time. A truss dob version is needed to take the telescope on board as hand luggage. Building it myself was not an option because of poor technical skills and lack of time. Luckily, I did not have to look far. Because at Sumerian Optics in the Netherlands I found a wonderful handmade product of which I was sure it could serve me for many long nights to come.
Mirror
With a 10 inch mirror, the light grasp is already quite good. Especially in darker areas where the Sumerian Alkaid is meant for anyway. The 8 inch seemed like a step backwards, while the 12 inch version may already be a bit too heavy for its purpose. This is because I want to take the whole package with me as hand luggage. At Sumerian, you can choose the mirror yourself. To make the whole even a bit lighter I opted for a thin mirror (from Orion Optics); an ultra-grade of F/4.8. This is fast, but (in my opinion) not yet fast enough to be in need for a coma corrector. And this is good, because it would surely add too much additional weight on the top. With a lambda of 1/10 and hilux coating I’m hoping to reach similar light collecting performance as my previous telescope.
The Sumerian Alkaid was ordered and I received regular updates on the progress and questions about preferences for the setup. Four weeks later I was invited to pick it up, one day before my departure to La Palma! I never expected to have it home so soon. So I was very happy with Sumerian’s flexibility to finish the product on such short notice. My concerns that the fast production would adversely affect the quality, proved unfounded. I received extensive information about the use and setup of the Alkaid and all my questions were answered with patience and in a professional way.
First impression of the Sumerian Alkaid
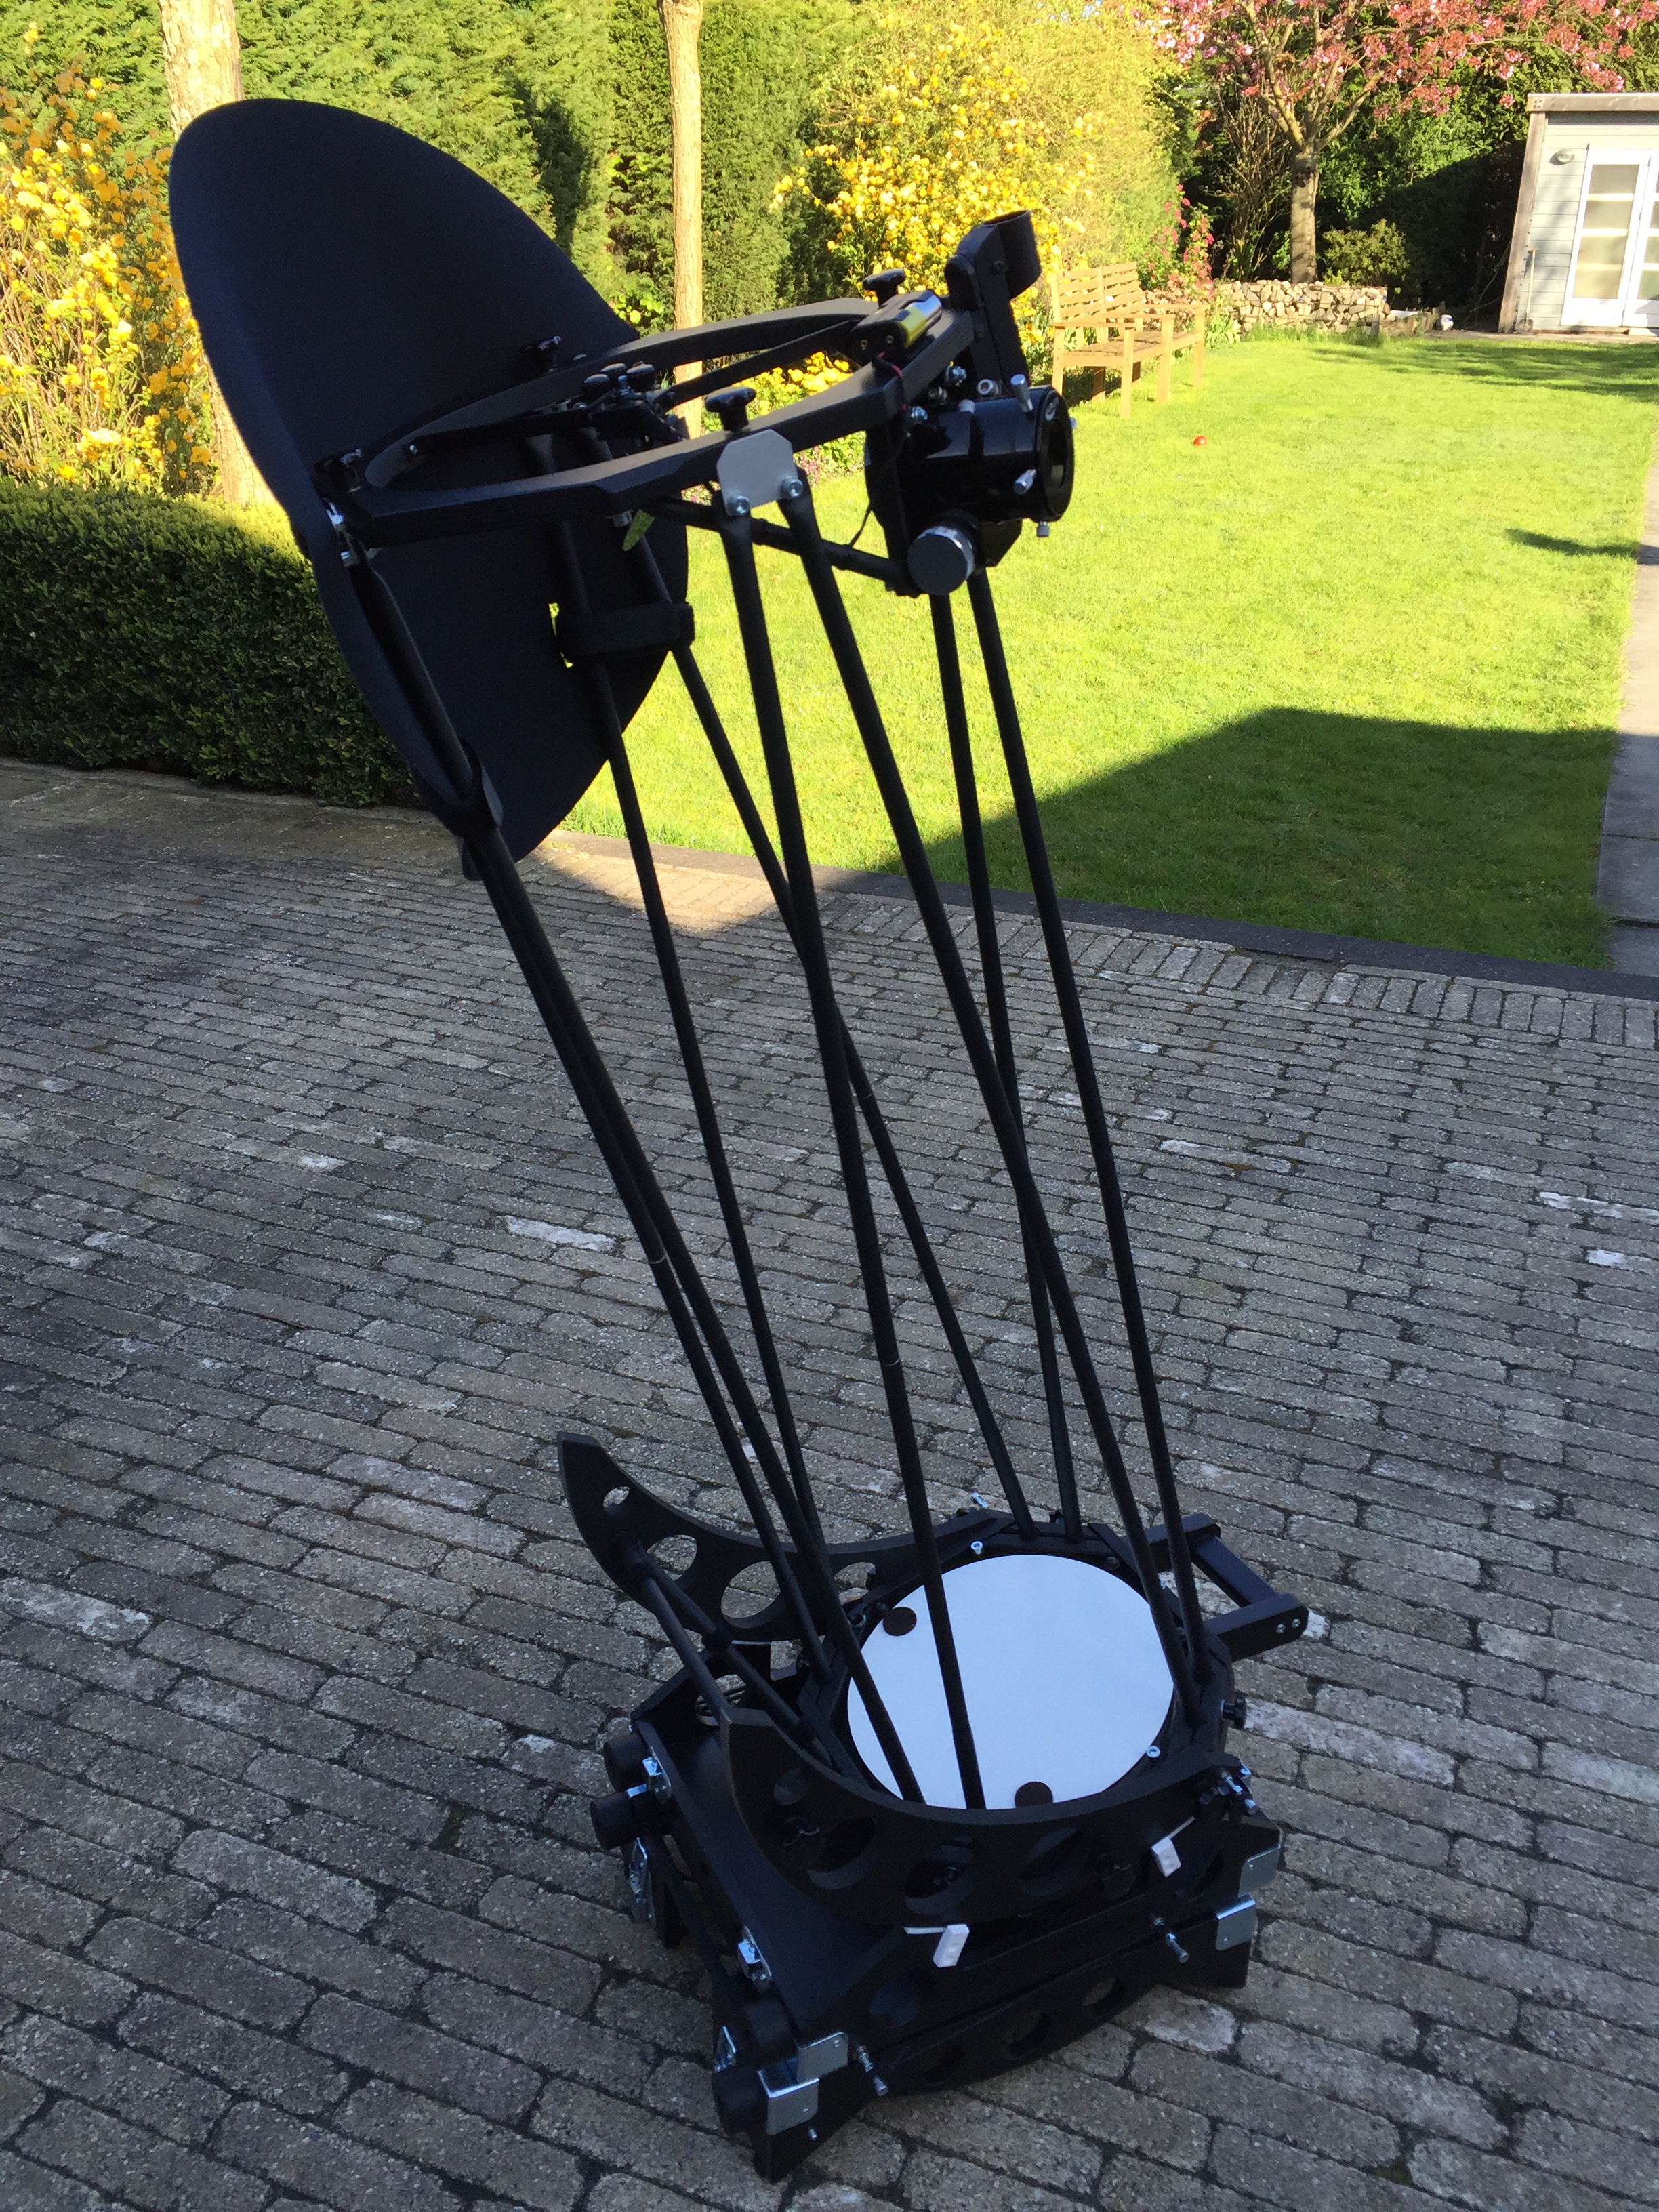
Back home, I immediately did a closer inspection of the scope. My first impression was that this really is a quality product. The materials being used, the finish, but above all how precisely all the individual parts fit together! The whole looks beautiful and it seems to me that a lot of trial and error have been needed before being able to build such a fine telescope. But that may also be because I have an excessive admiration for professionals who are able to design something like this 🙂
The repetitive setting up and dismantling of the construction and general wear and tear can quickly leave its marks on any commercial telescope, but with this one I have the impression that it is a very solid and durable product. Since I only have the Sumerian Alkaid in possession for a couple of months now, naturally it remains to be seen whether in practice this will indeed be the case.
Setting up
The first time I did the set-up, I was careful not to work too quickly and especially not to exert too much force on the parts. With the supplied description it takes about 30 minutes for the first time before the Alkaid is erect. Quite a long time, but once you get the hang of it the time is reduced to approximately 10-15 minutes. An advantage is that the set-up doesn’t require any tools and this is very useful when you’re in the dark. The bolts which tighten the various parts have a nice grip and are stored in a bag that can be carried inside the case. For every type of bolt there is a spare one. Finally, using adjustable feet puts the chassis down firm and level.
Transportation
It’s very difficult to make mistakes during buildup, so the whole is very “poka yoke”. The assembly and disassembly are logical and after one time of use I didn’t need the manual anymore. It’s not even necessary to disassemble the Alkaid after every use. At home, it is stored in a corner and ready to use, so that I can take it outside or in the car at any time. With its 10 kgs you can lift it up and put it anywhere you want, very grab-and-go.
With the supplied fan it’s possible to cool the mirror a bit faster for more quality time at the eyepiece. Once built up, the dob can easily be transported in the car when I put one of the rear seats down, however I do think it’s best to use a station wagon for that. With 1.25 meters in length (excluding light shield), it will not lie comfortably on the back seat of every car.
Tracking
As an extra I also ordered a tracking platform which Sumerian builds too. A very pleasant feature to keep the image still while observing and sketching, especially at higher magnifications. The platform fits perfectly with the Sumerian Alkaid and is equipped with Teflon pads, making the “normal” chassis redundant.

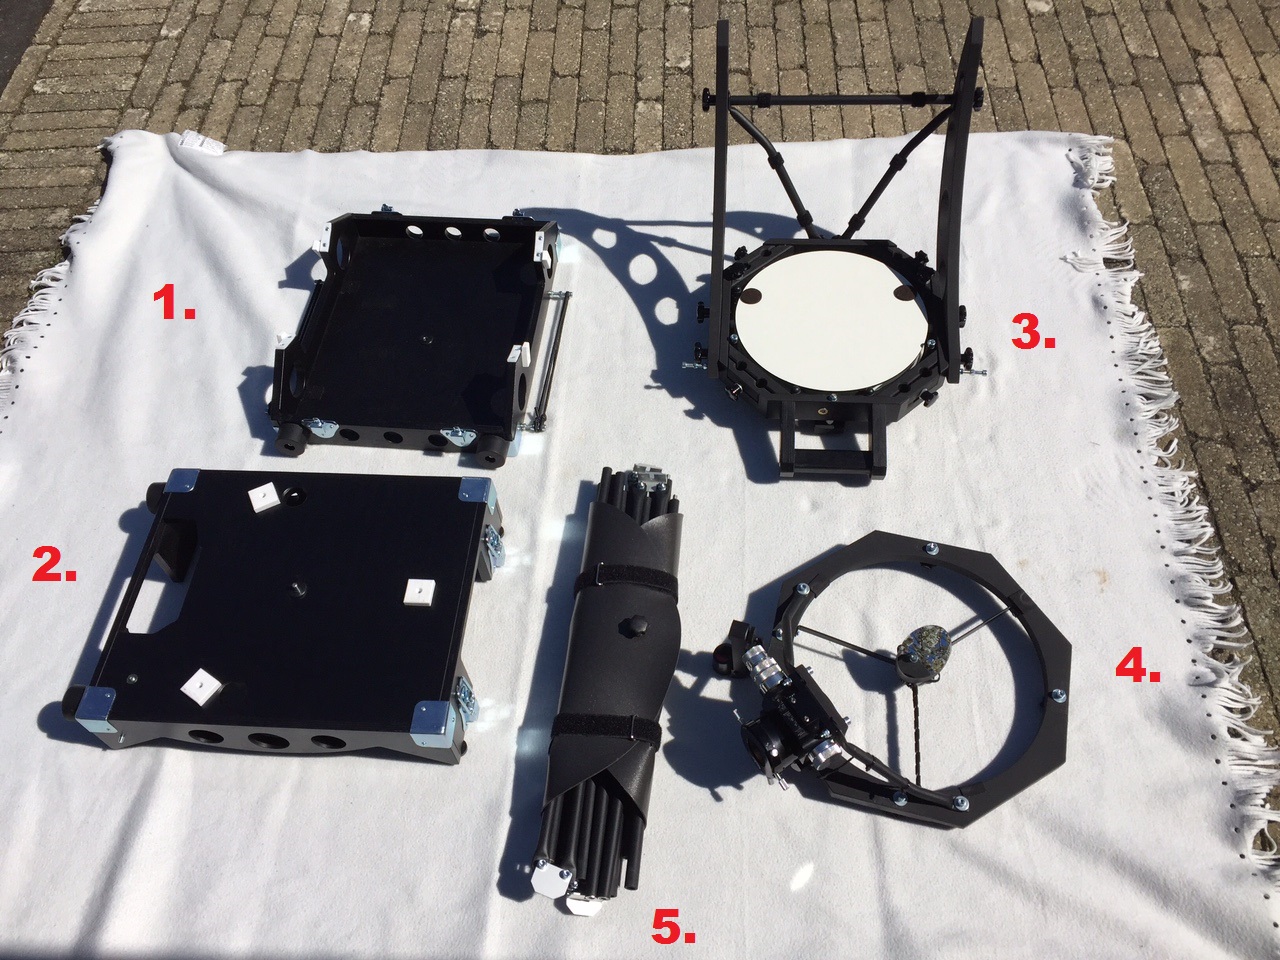
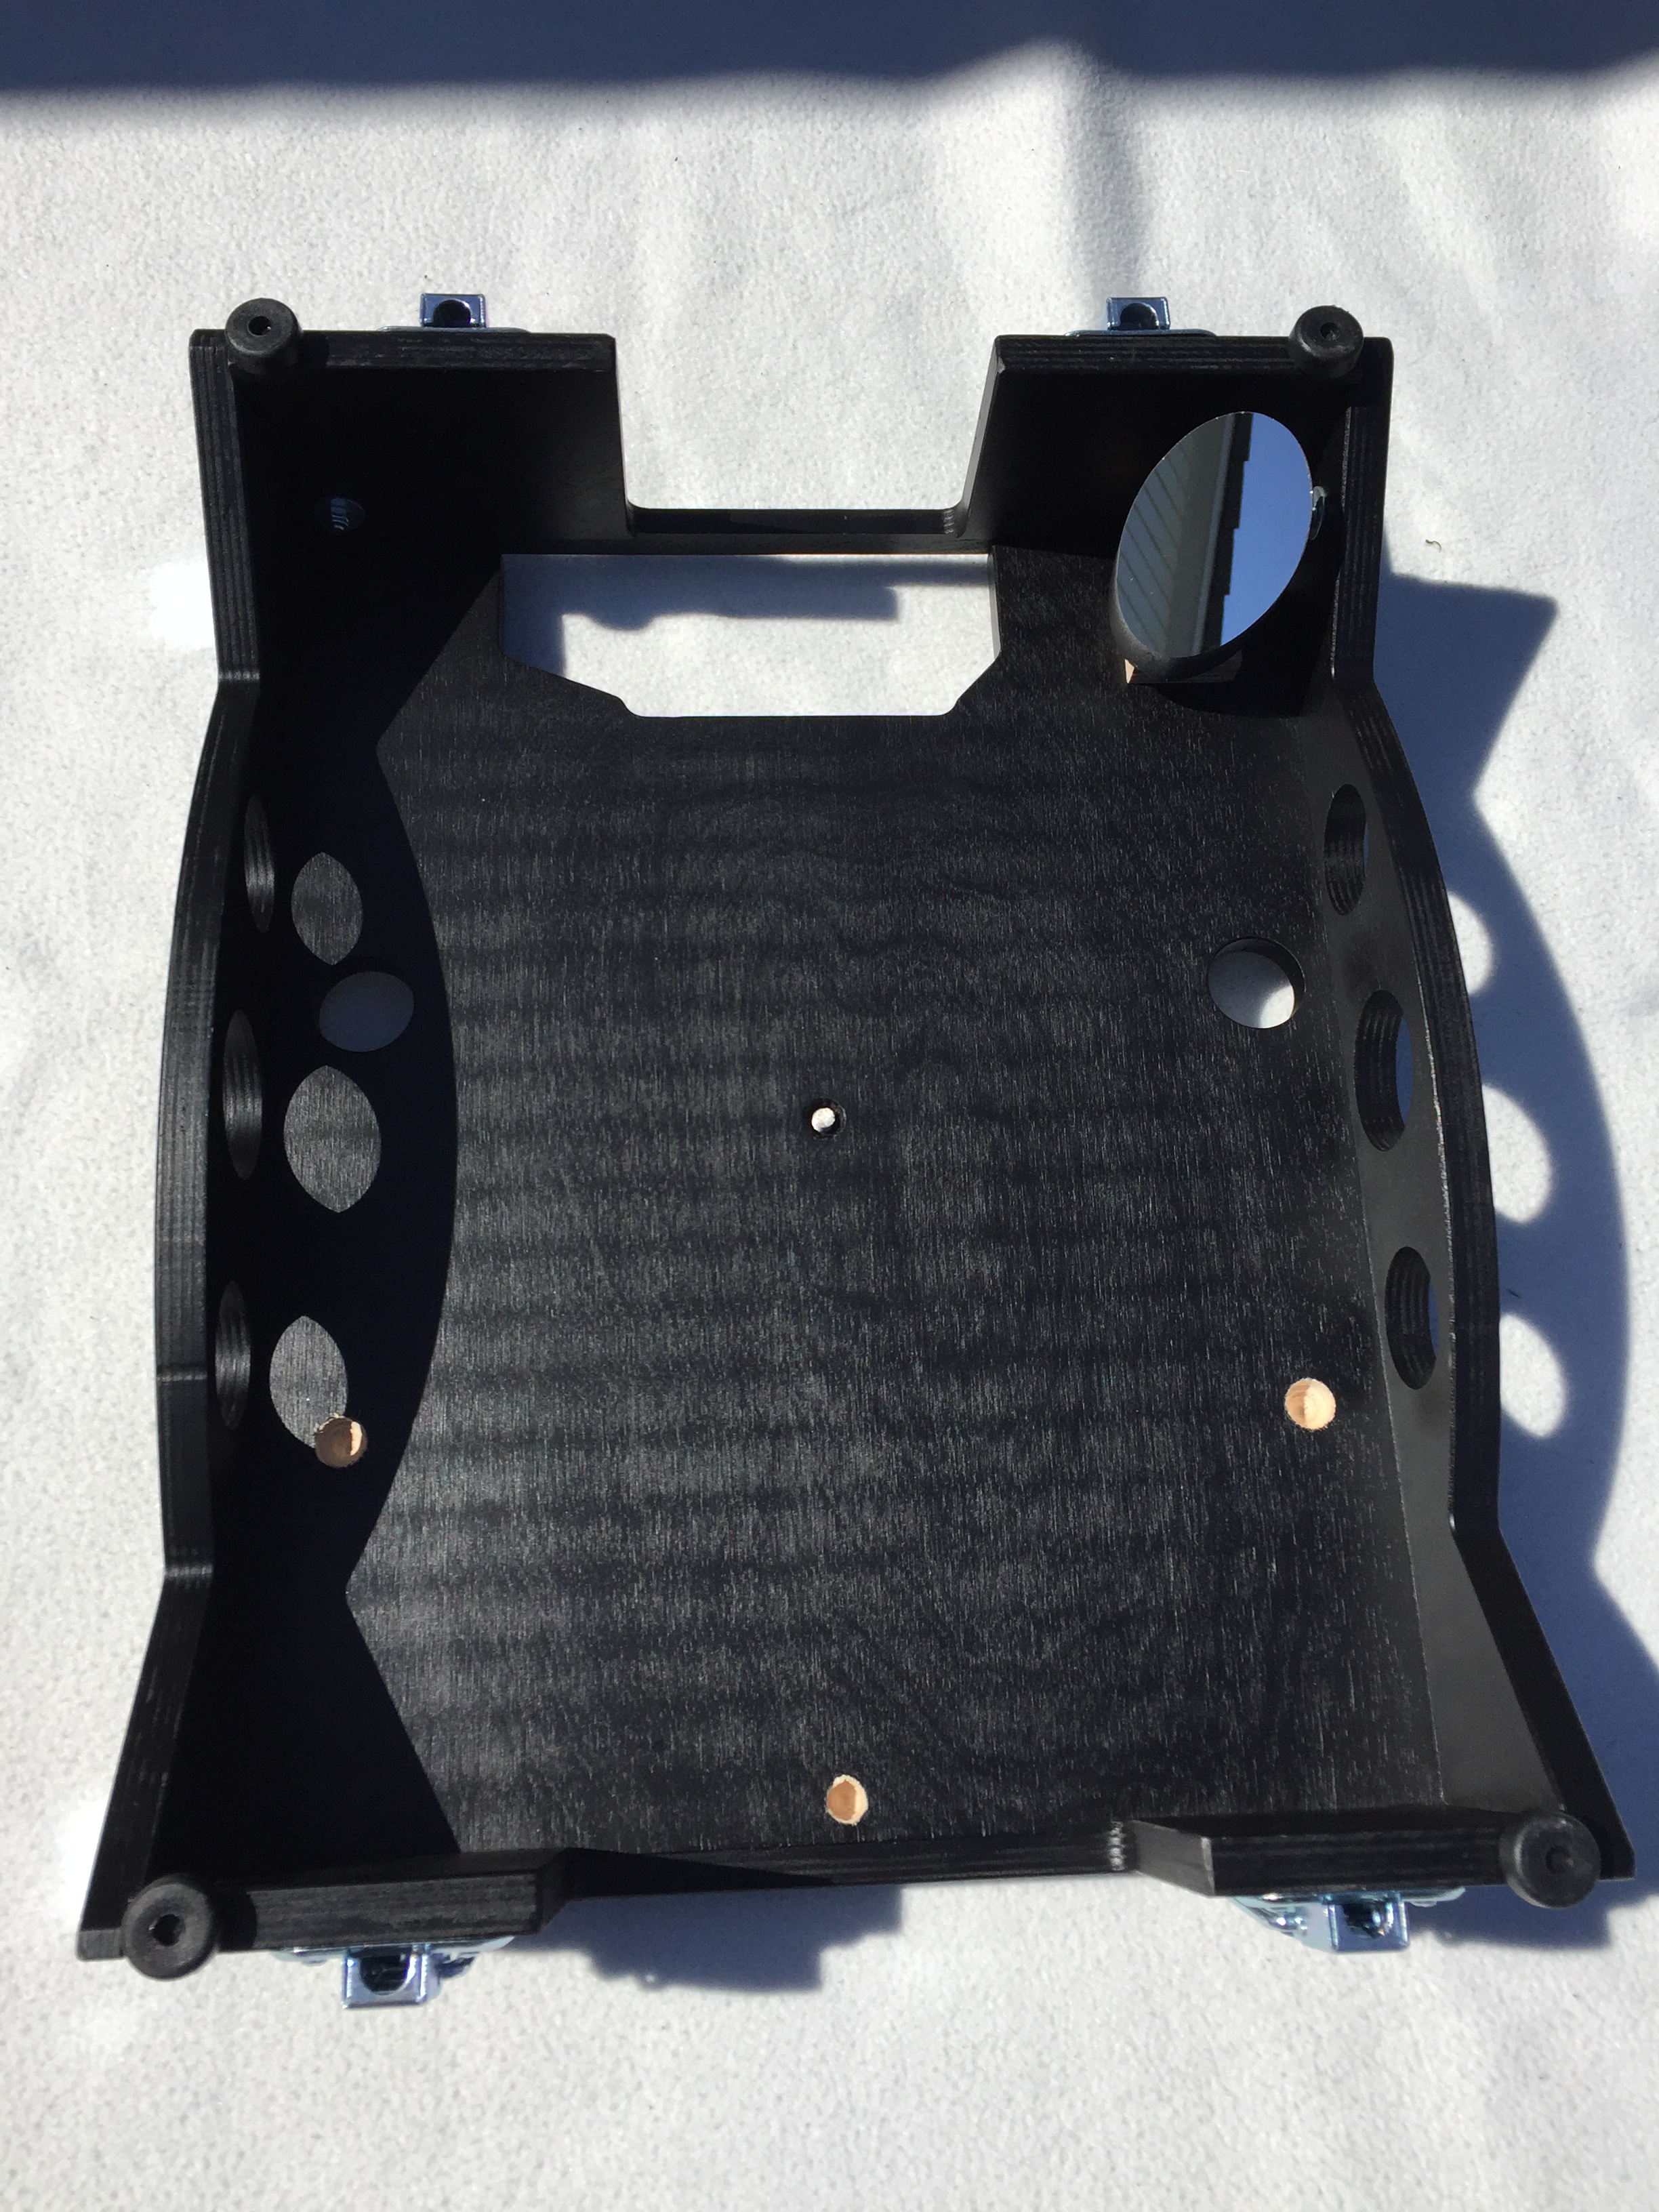
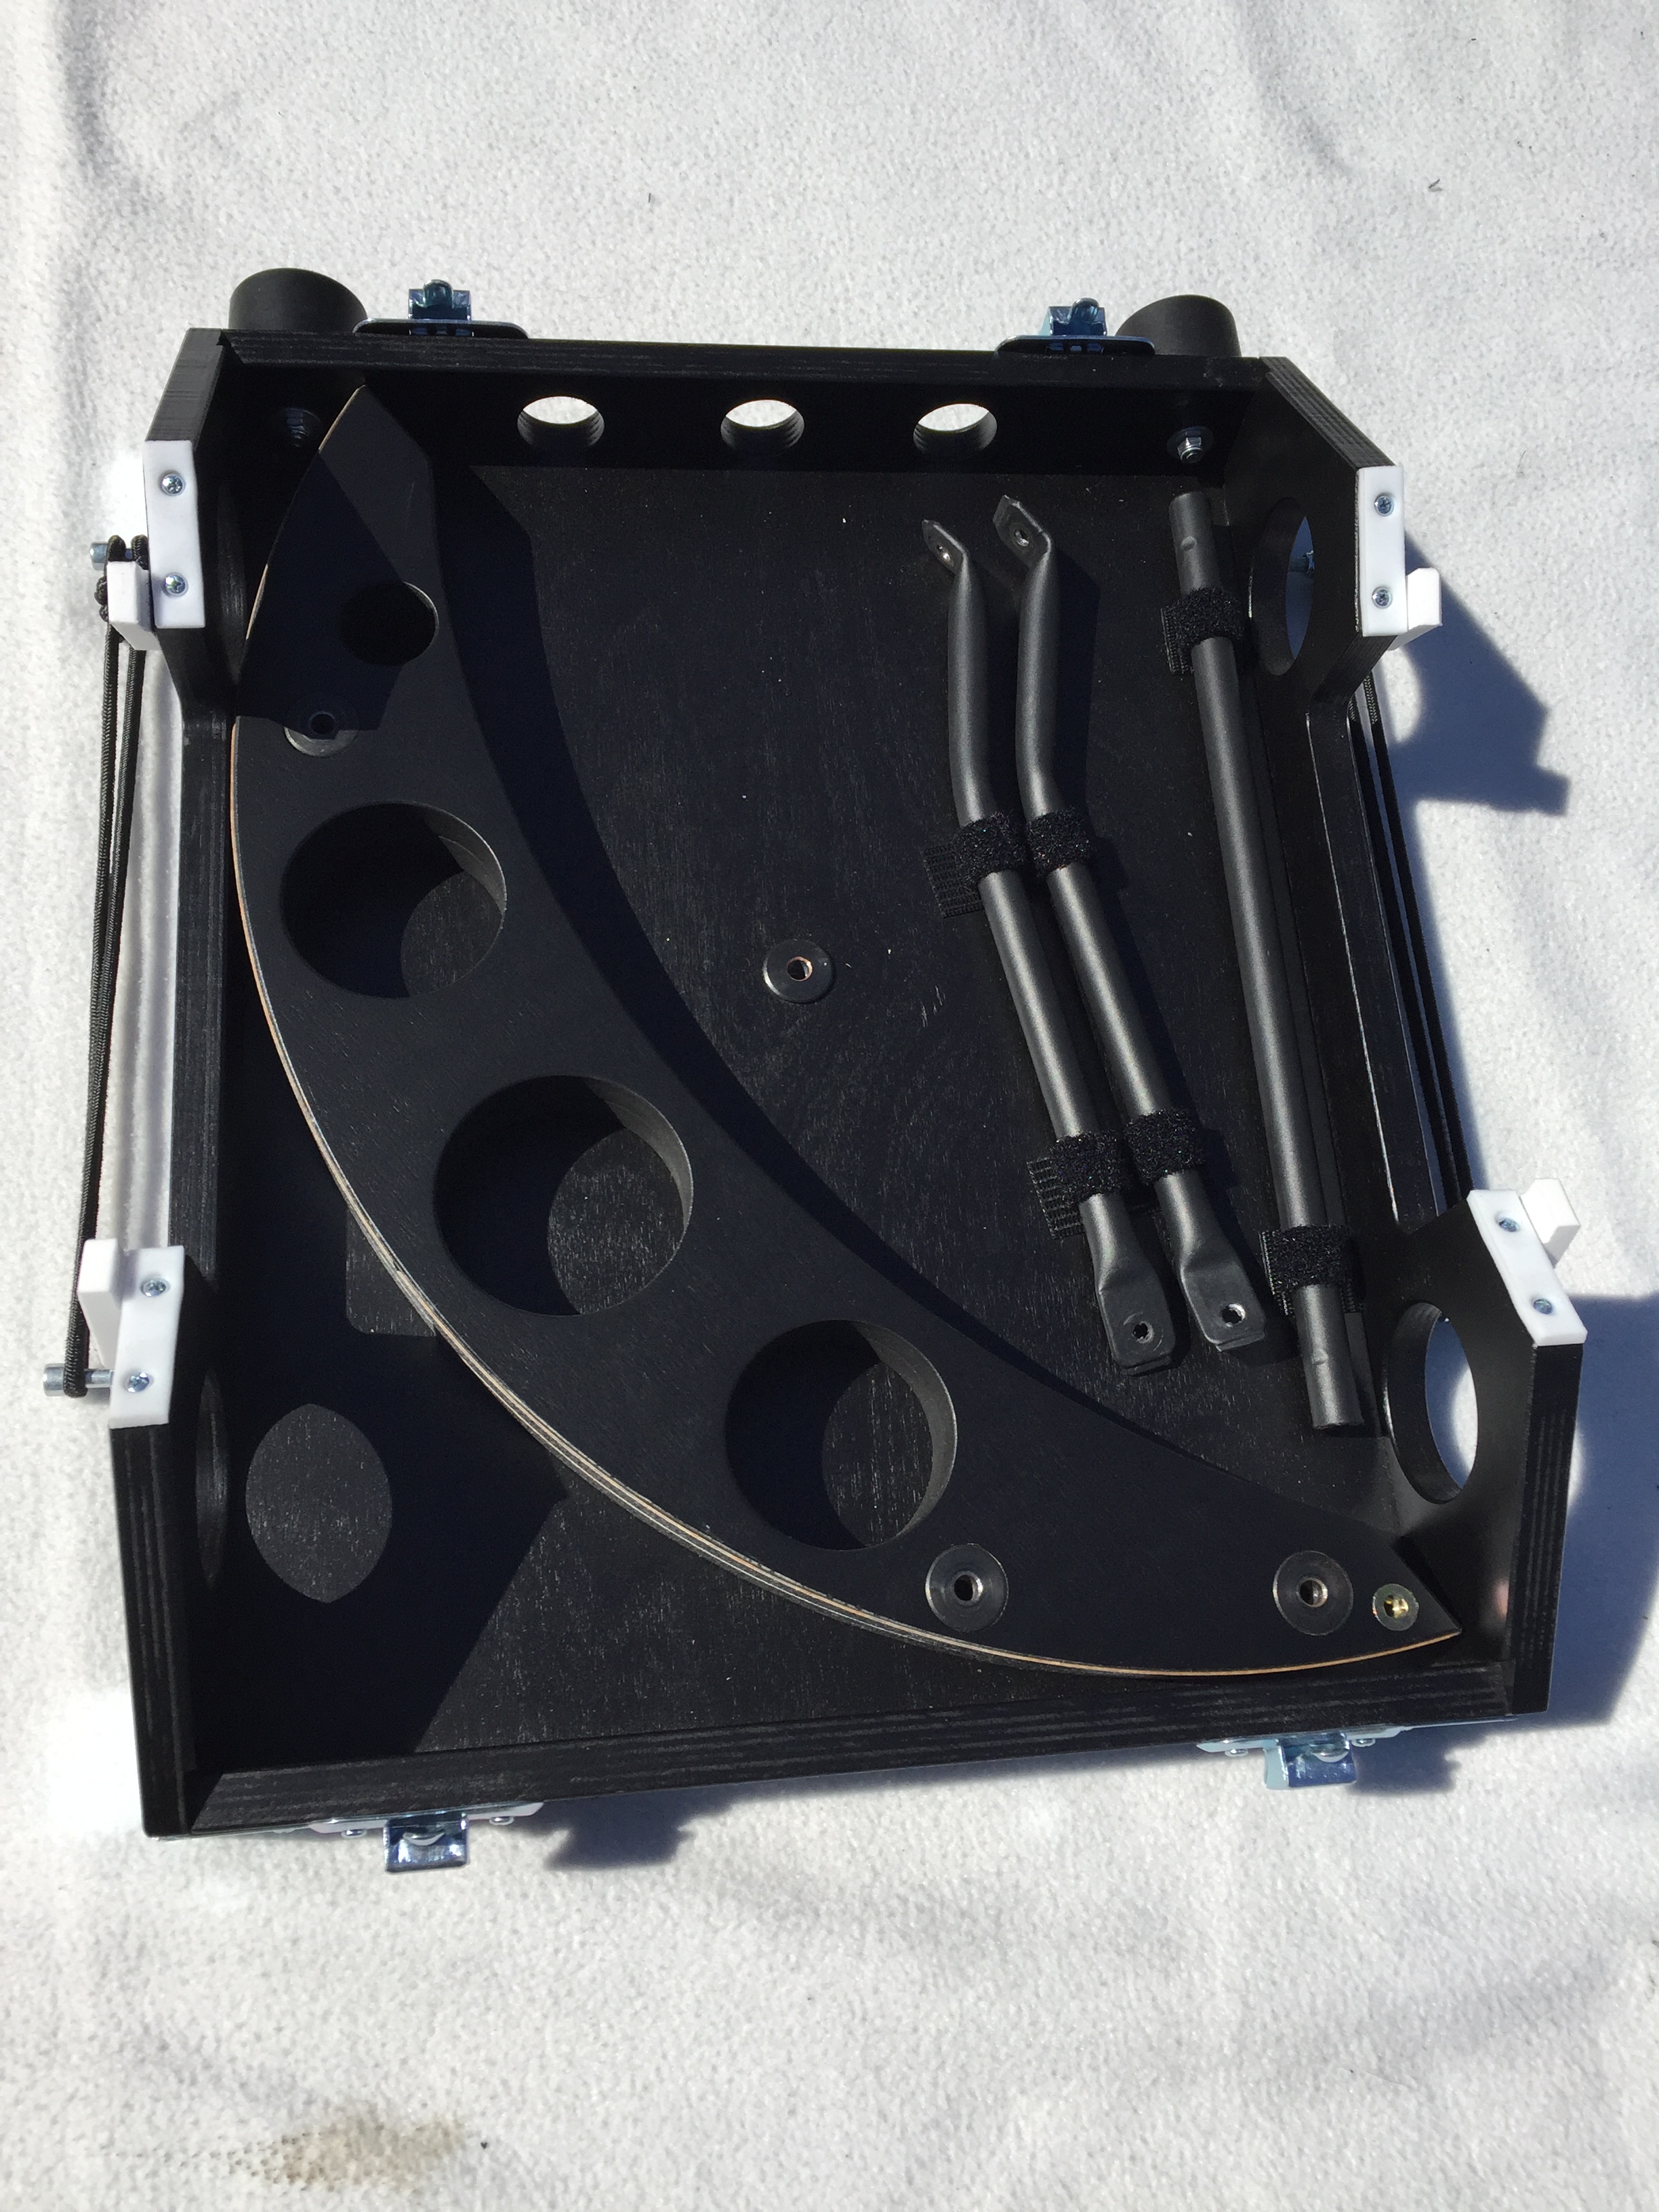
The Sumerian Alkaid in loose Parts
- The tray with 4 teflon pads on which the “bananas” rest for altitude motion.
- The base on which the whole setup rests, with three pads for azimuth motion. (redundant when the tracking platform is in use)
- The mirror cell, mounted with a convenient handle, bananas and rods that provide stability.
- The upper ring with secondary mirror, focuser and RDF mounted.
- The trusses, that can be unscrewed in two parts, wrapped in the light shield.
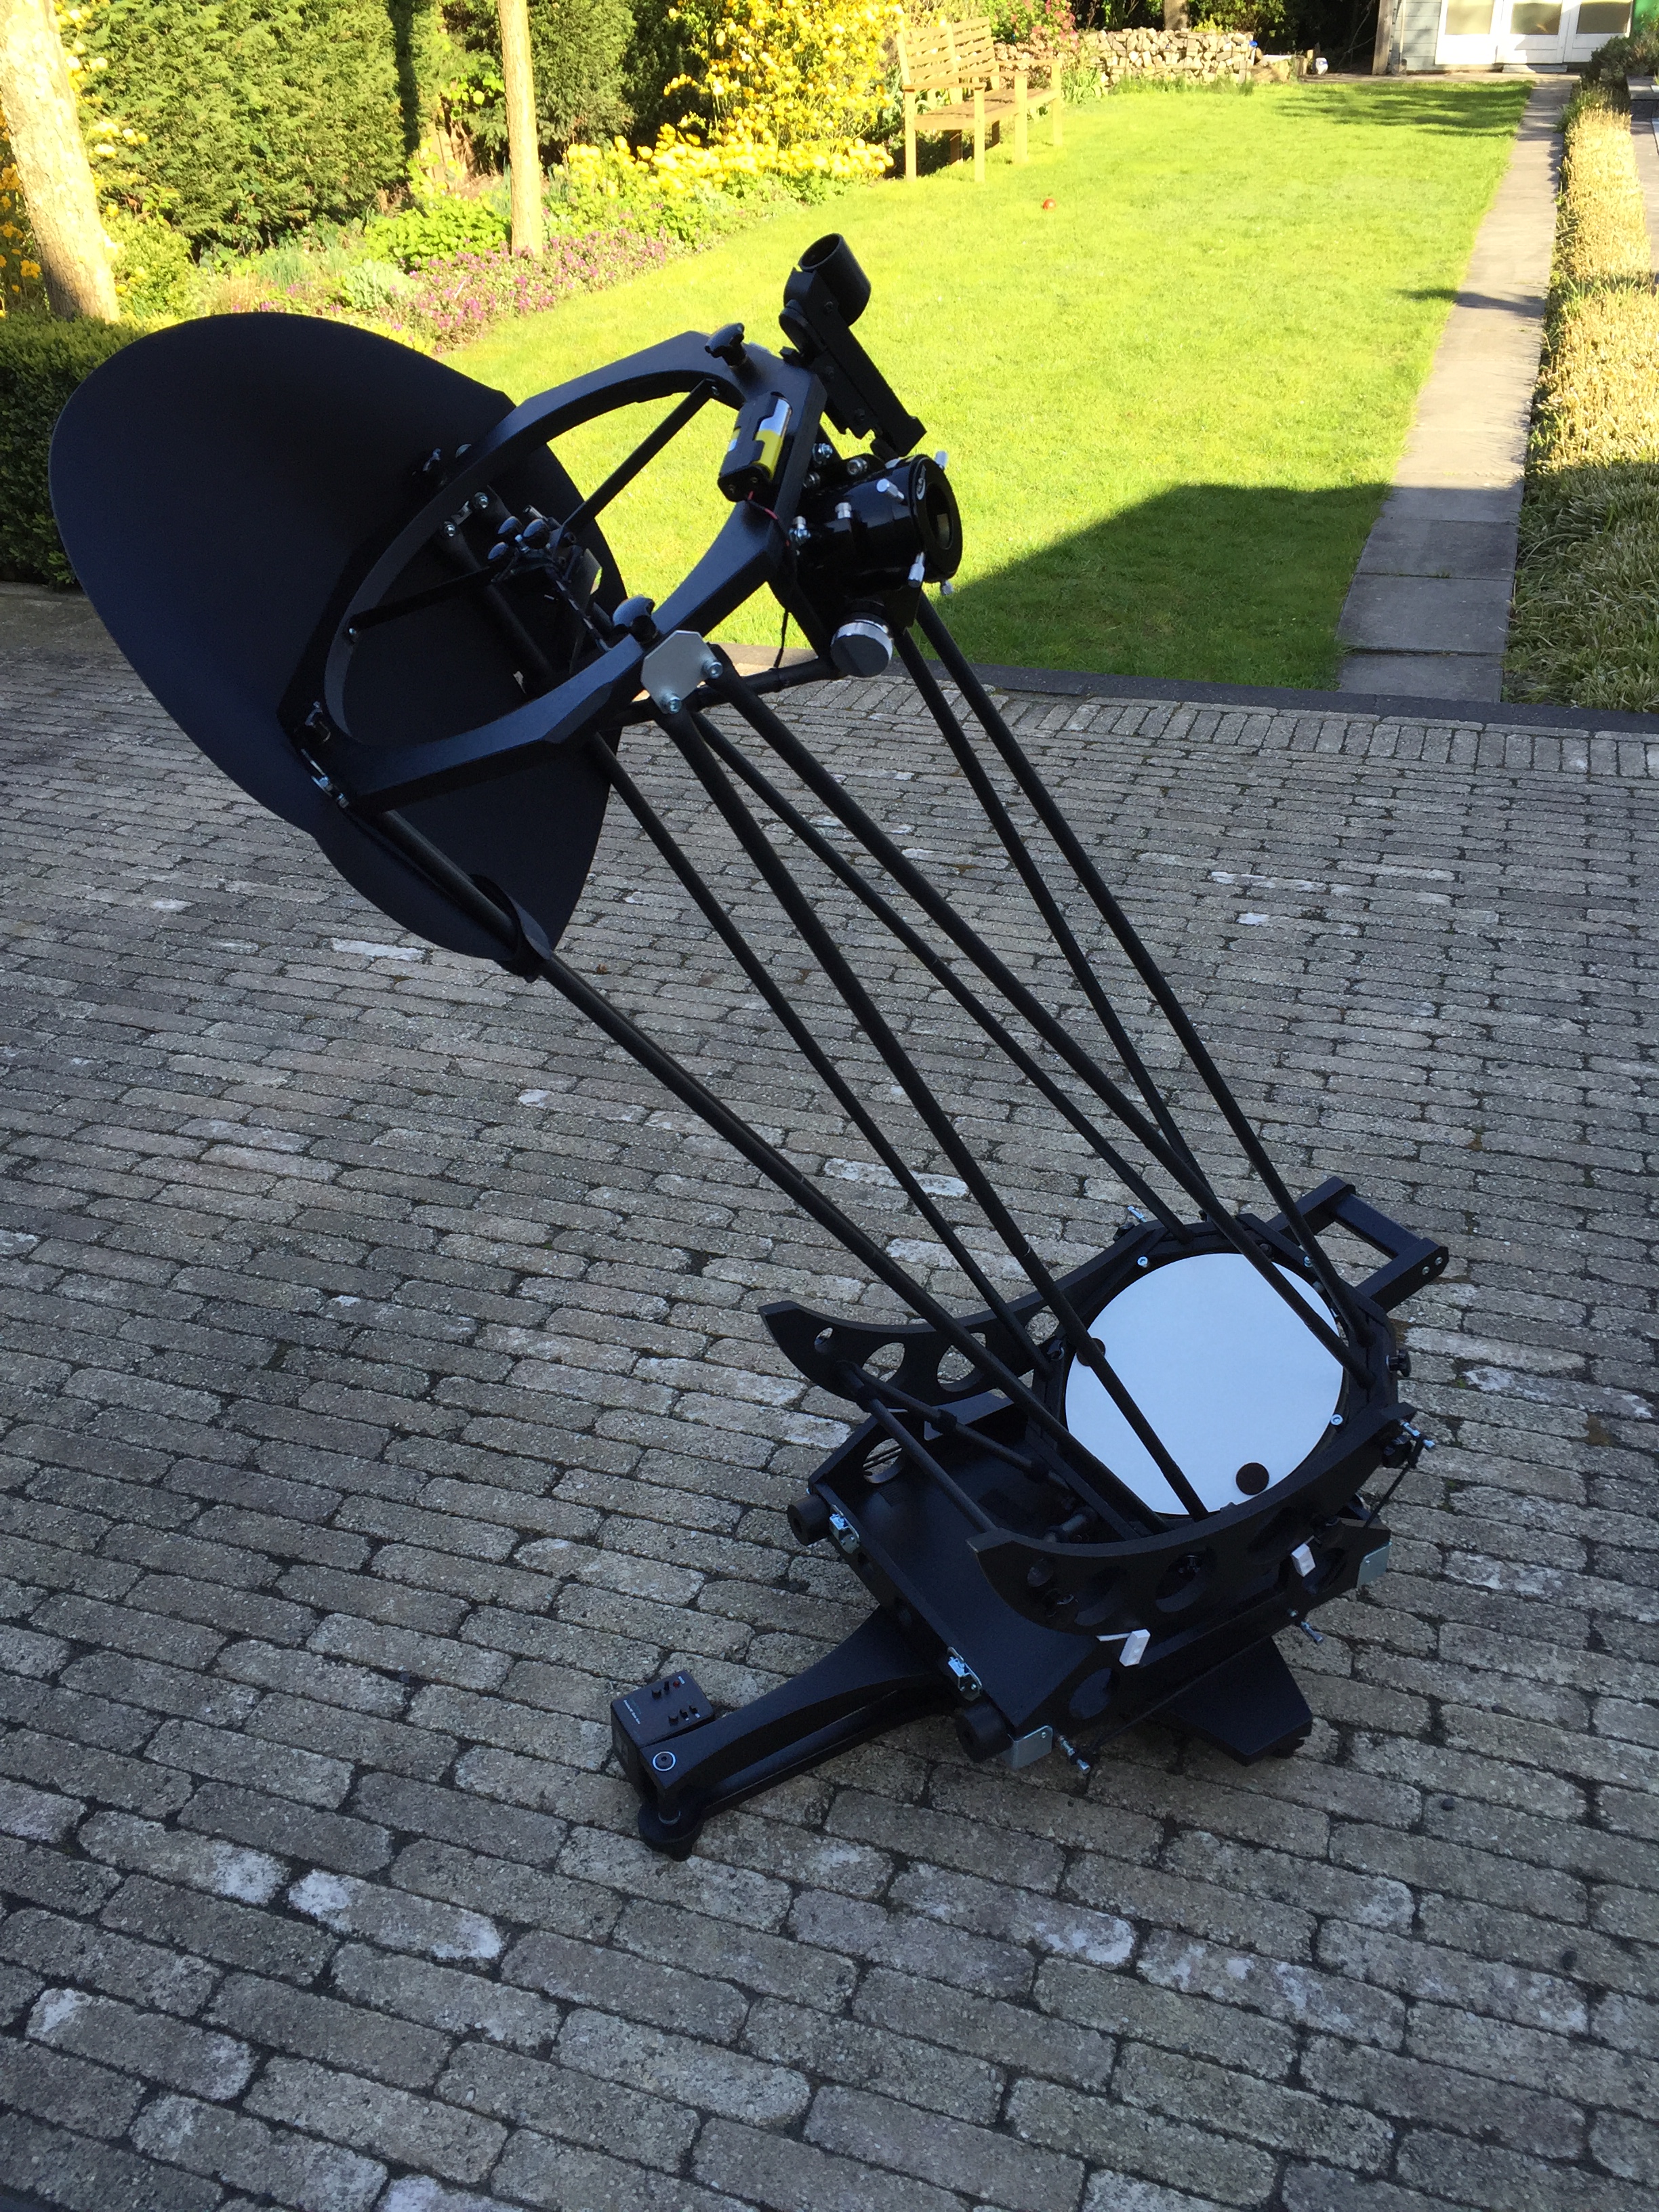
Balance
Once set up, the lower assembly is provided with elastic wires on both sides for balance, these are necessary in order to avoid tumbling. My previous telescope was equipped with friction screws, but the wires work a bit smoother. One wire should be fixed at all times (even without an eyepiece in the focuser), a second with the use of heavier eyepieces (to a max of 600 grams in my case, because of the relatively light mirror).
When changing even heavier eyepieces, this might cause the Sumerian Alkaid to move upward so that the object disappears from view and will need to be located once more. From 45 degrees and above this does not happen because the wire is less tense. But when observing near the horizon this might prove a disadvantage. See below how it looks in practice. The lower one decides to observe, the tighter the elastic wire will be.

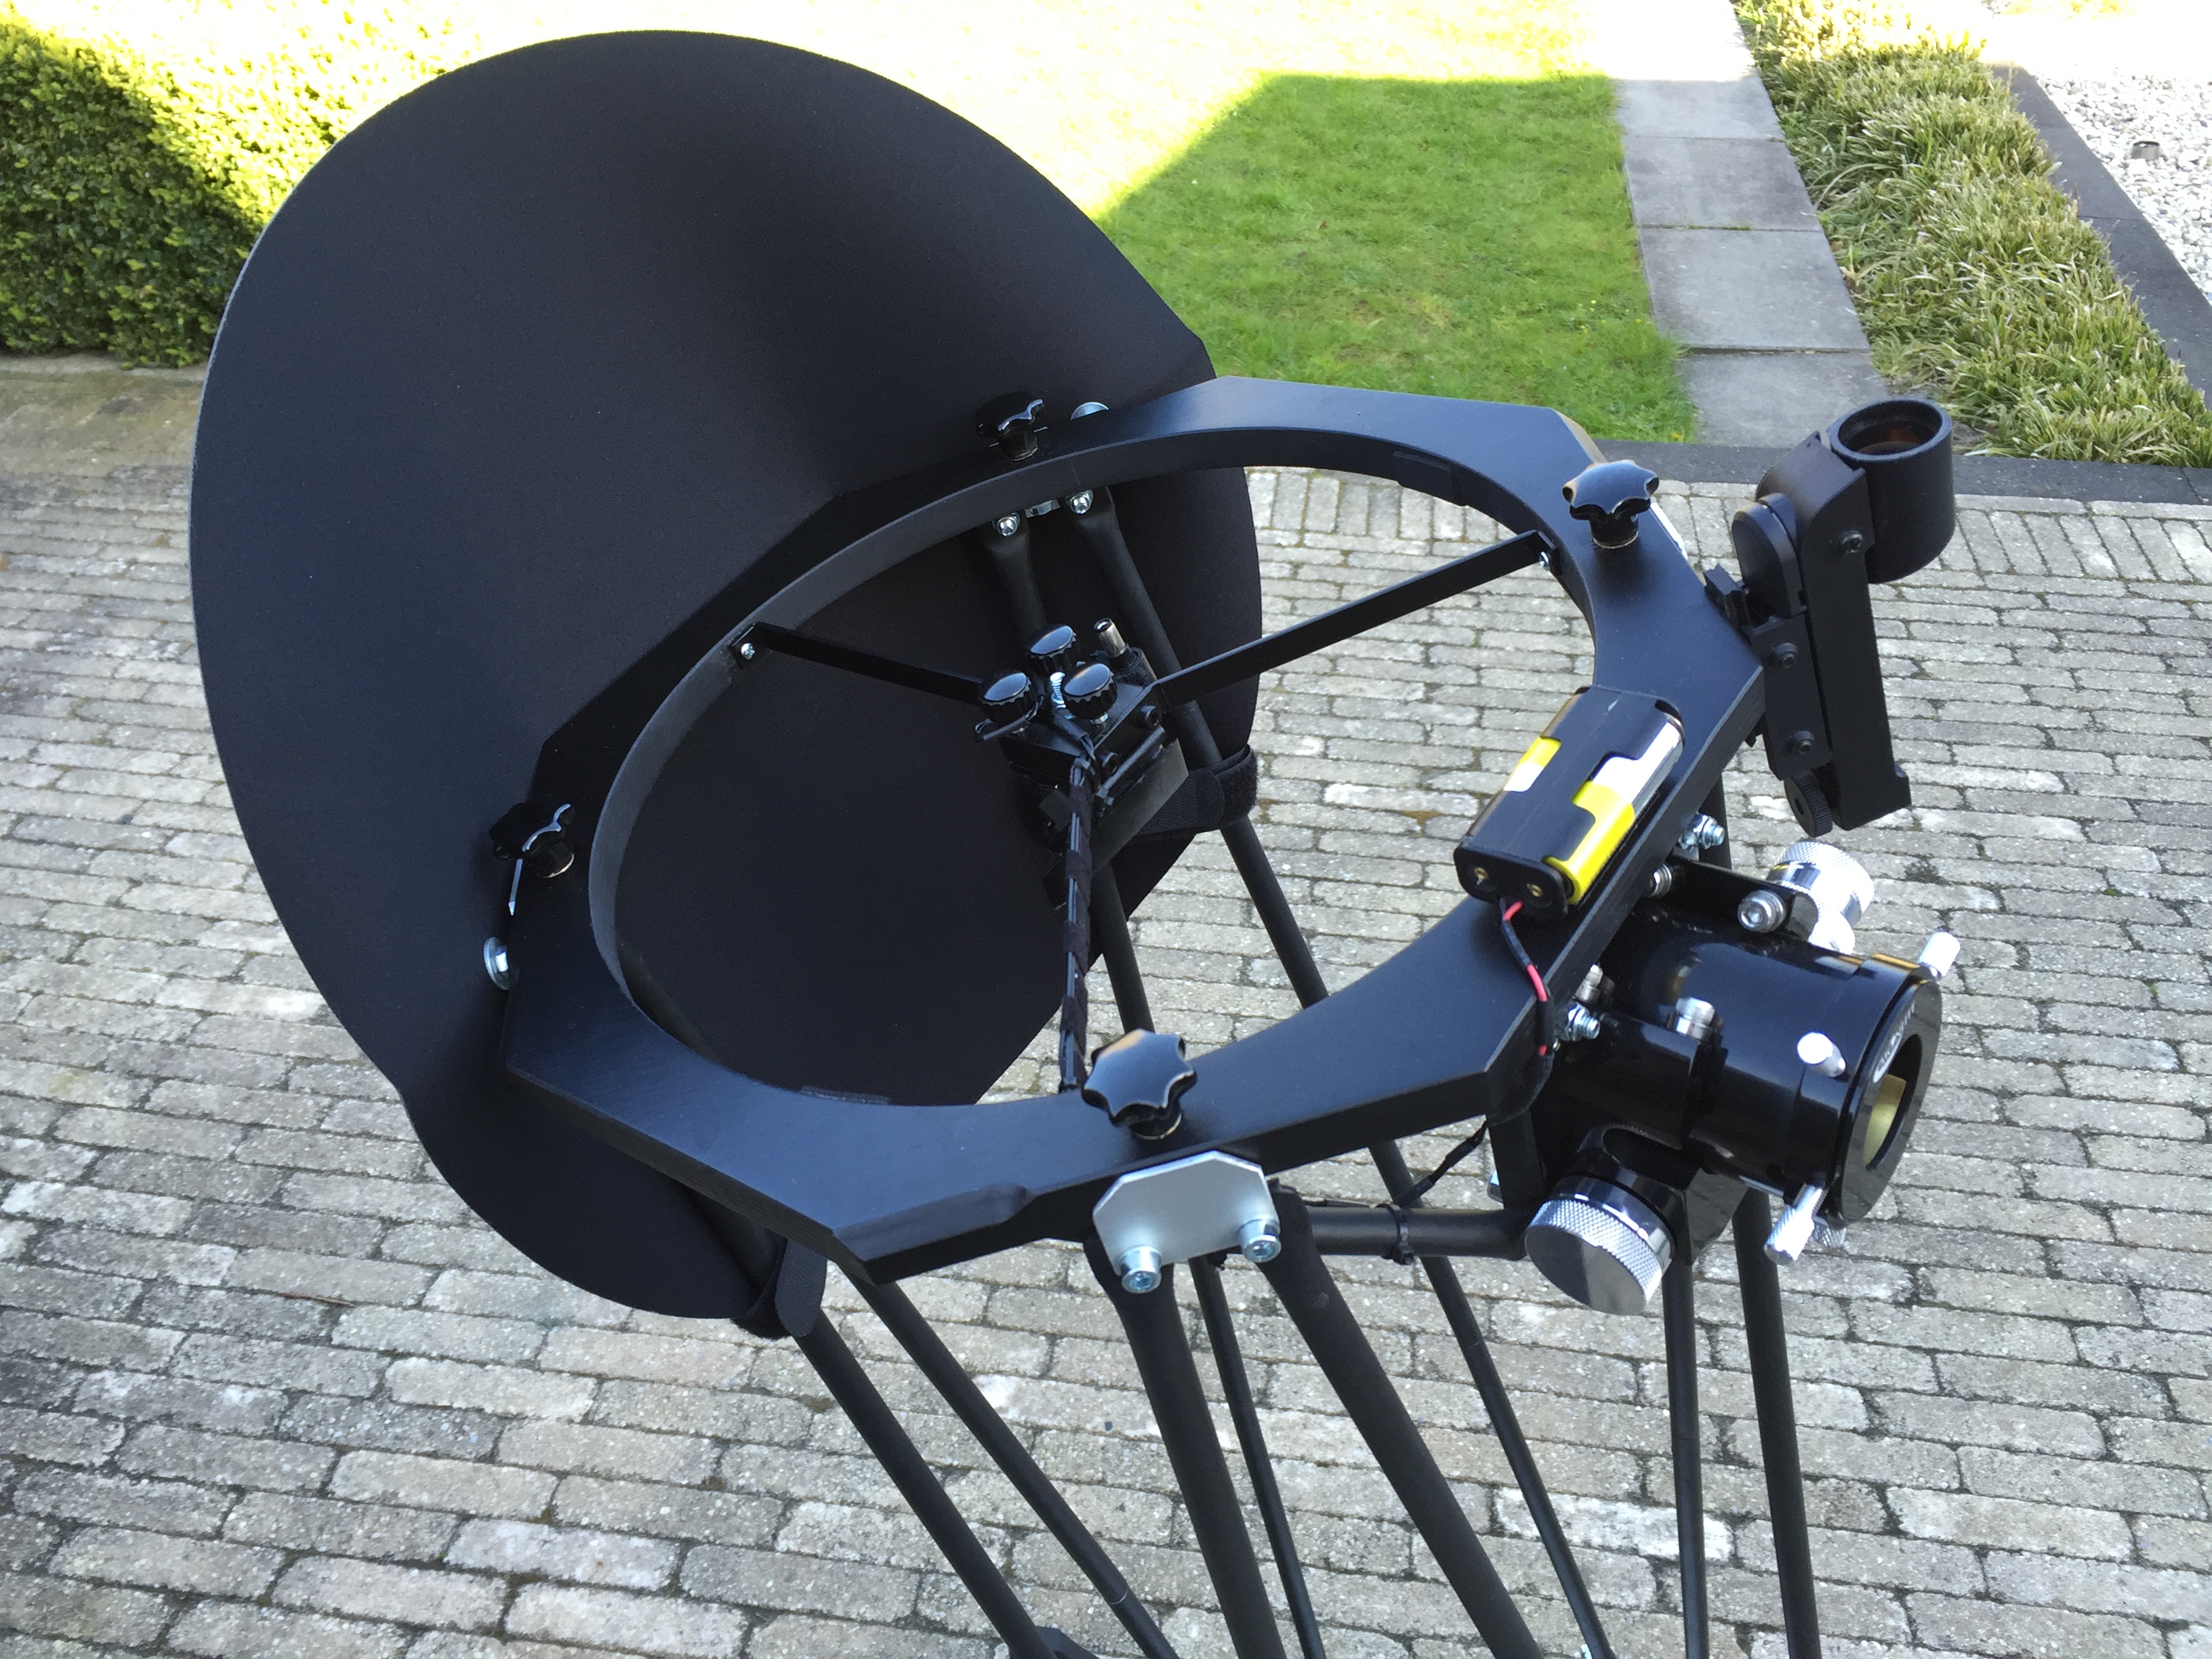
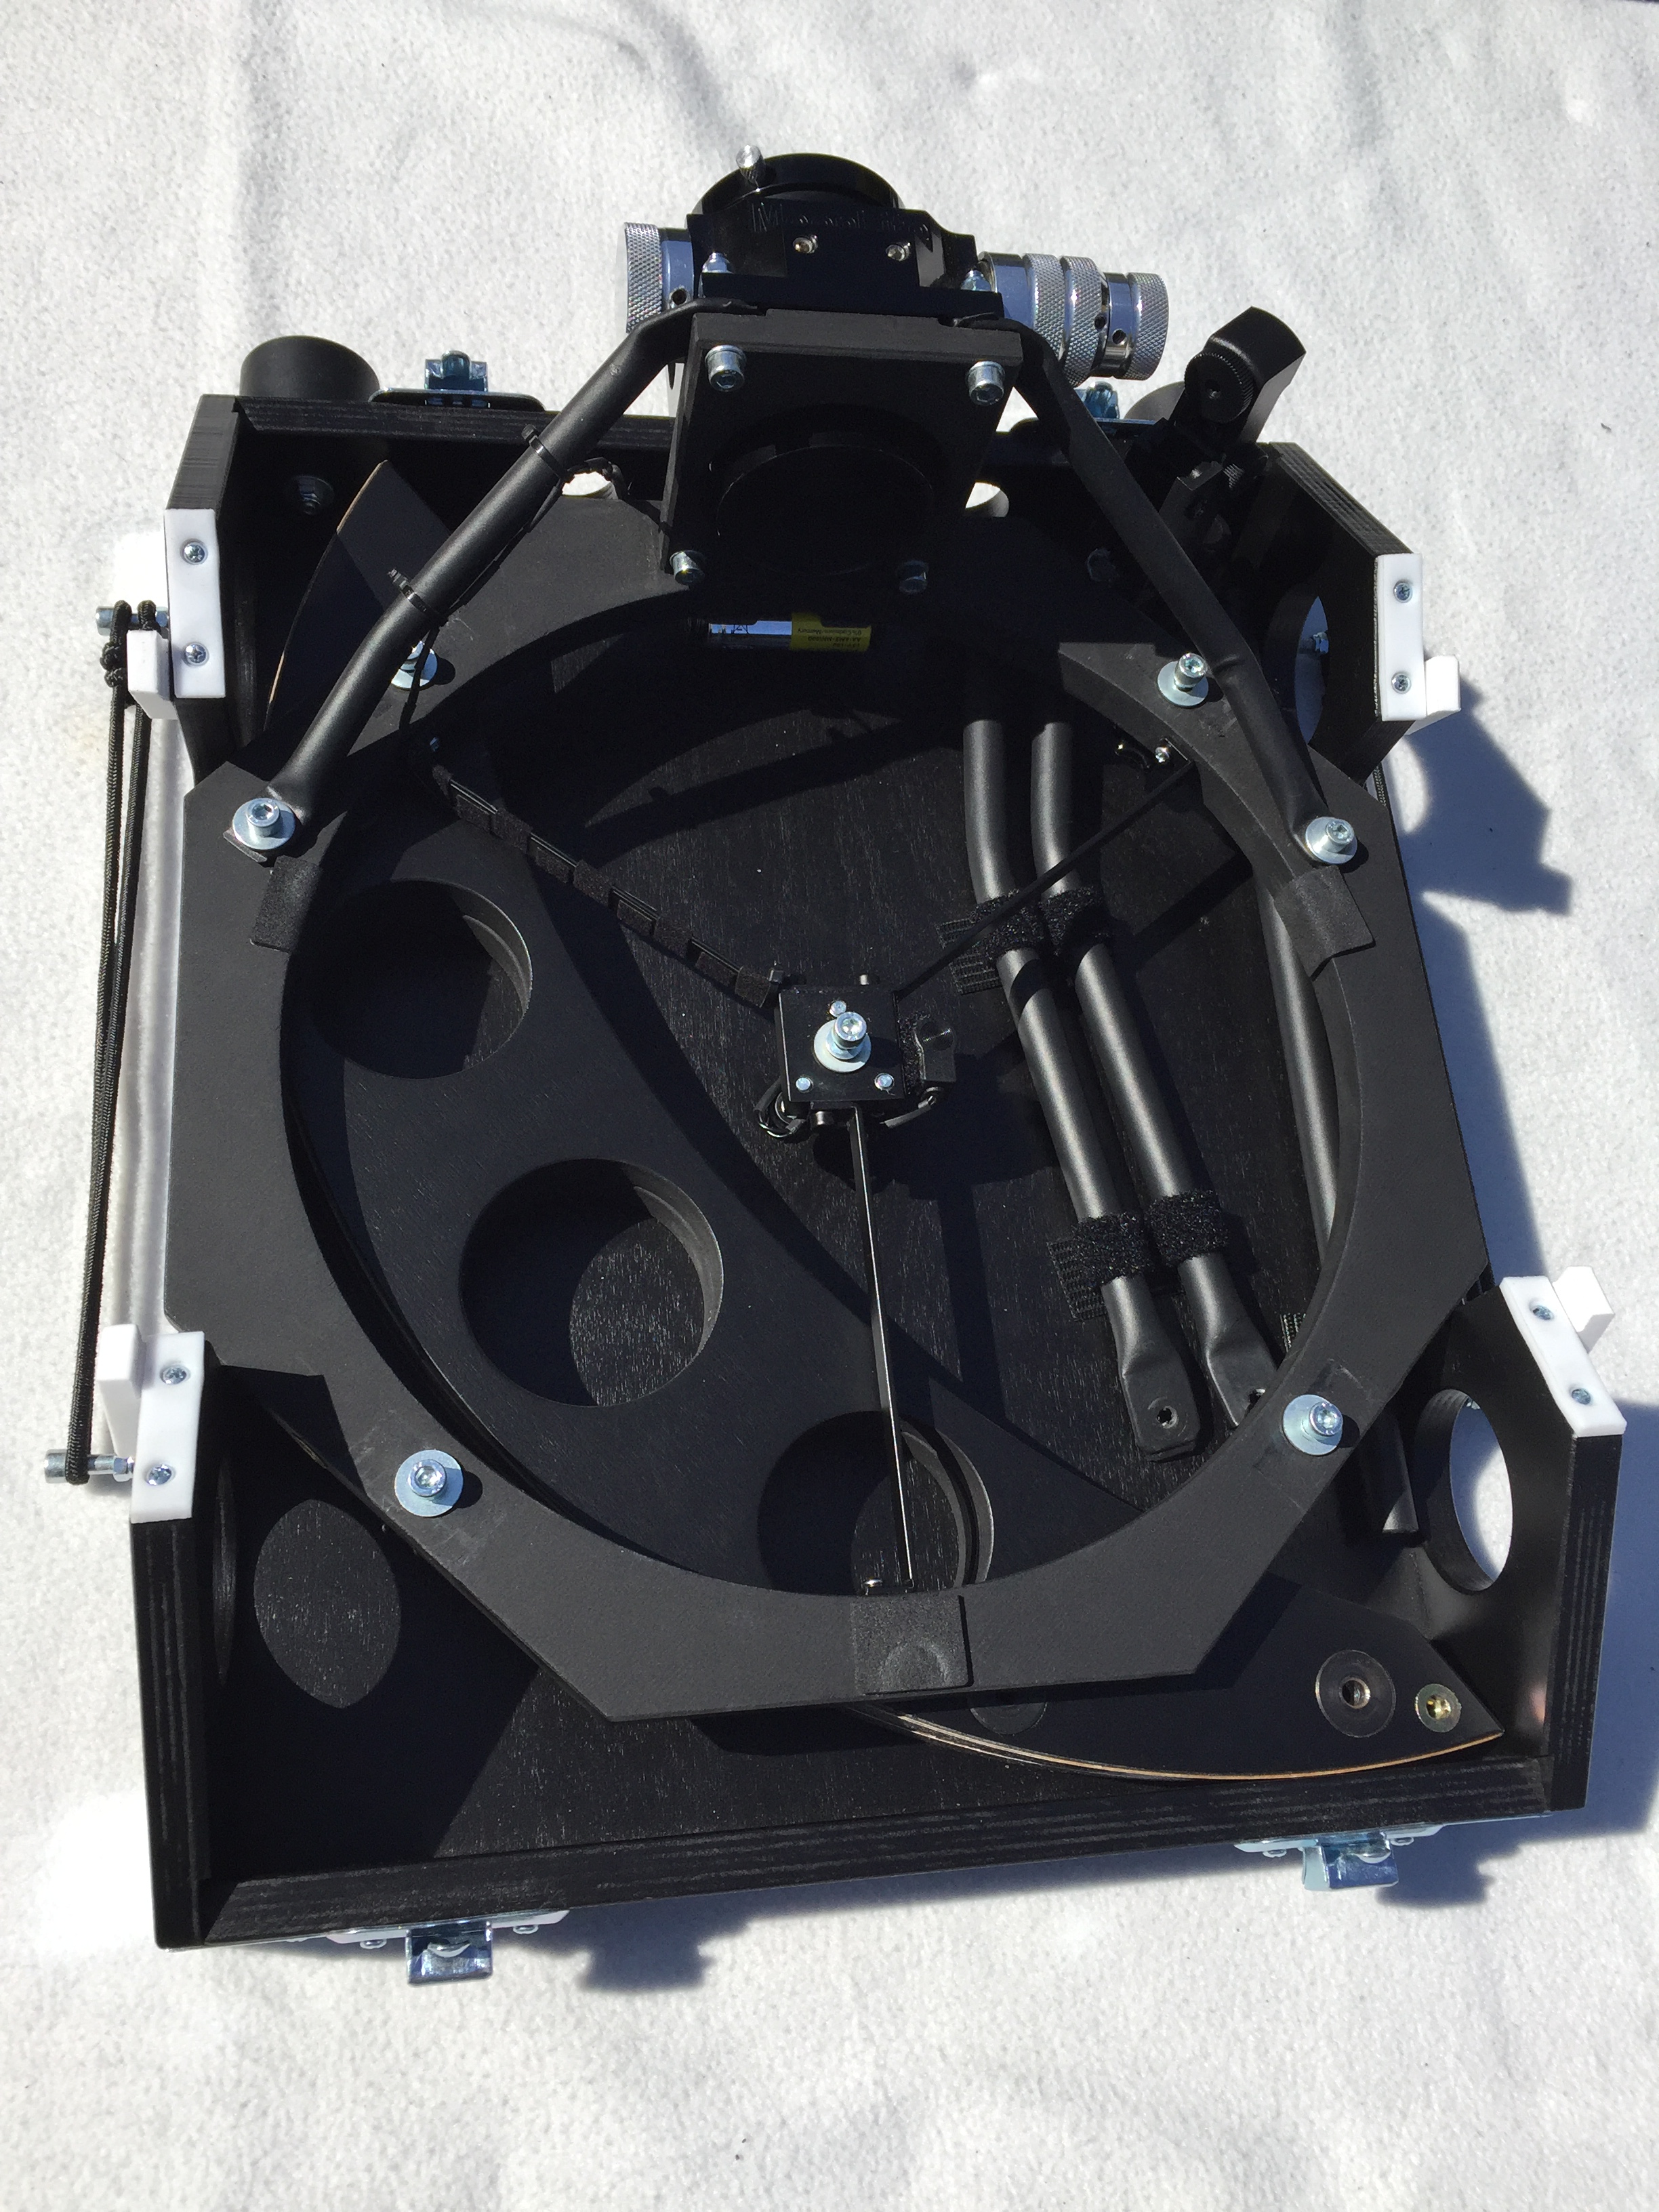
Upper assembly
Moving on to the upper assembly. Here the focuser, RDF, secondary mirror and light shield are installed. The focuser is a Moon Lite CR2 and is a dual speed (1/10); very high quality and a pleasure to work with. It runs as soft as butter and is easy to adjust. This one does not need to be assembled and disassembled every time, because it’s fixed to the construction. The same goes for the RDF. However simple (and made of plastic), it just does what it should do: put a dot in the sky in the area where you want to observe and that’s really all you need.
It’s easy to adjust and occasionally you’ll need to do so because it’s fixed to just a very small area (thin ring) and thus not rock solid. I do have to get used to the lack of a finder scope (right angled, upright image). Star hopping is a bit less straightforward without it, but you’ll just have to get used to that.
Secondary mirror
The secondary mirror must be fitted (and collimated) each time because it would otherwise be impossible to fit into the compact case design. Fixing is done quick and easy and Sumerian also thought about heating. A wire runs along one of the spiders to the secondary mirror holder. From here you simply have to connect a plug if condensation occurs. The whole is nicely put out of the lightpad so that it doesn’t contribute to the total obstruction. With the use of two AA batteries the mirror is free of dew within 5 minutes so that you can quickly return to observing.
When dismantling the Sumerian Alkaid, the secondary mirror is put away in the base by means of a single screw, a beautiful and effective solution. Finally, the light shield is fixed with two screws to the ring and with Velcro tape around four of the trusses, this way it’s fixed tight. I feel that a light shield is a must to reduce unwanted light and reflections at the eyepiece.
Collimation
Once the setup is done, the telescope should be collimated. First the secondary mirror is connected at the right angle to the focuser and evenly tightened to the holder by means of three collimation knobs. I use a laser to collimate the secondary and a cheshire for the main mirror. Of both mirrors, the secondary will be the most off-axis as it must be fixed each session, but with the aid of the adjusting screws, it’s a breeze.
Then the primary mirror; this really works great! Only two knobs on top of the mirror are needed for this job, therefor collimation can even be done in zenith. Another advantage is that the screws have no end stop, but can be twisted endlessly. An ingenious system that makes collimation an easy task and can be repeated without much trouble during a session. Even though the trusses are very stiff, collimation will slightly change during movement in altitude. Not very serious, but still noticeable.
Depending on the weight of the eyepiece in use, the upper assembly will slightly “hang” on the trusses. This is inherent and perhaps a drawback of the lightweight and open design of this type of telescope. The critical observer will therefore prefer to view objects in a specific area and collimate again when the scope is moved to another area that is much higher or lower in the sky.
Mirror cell
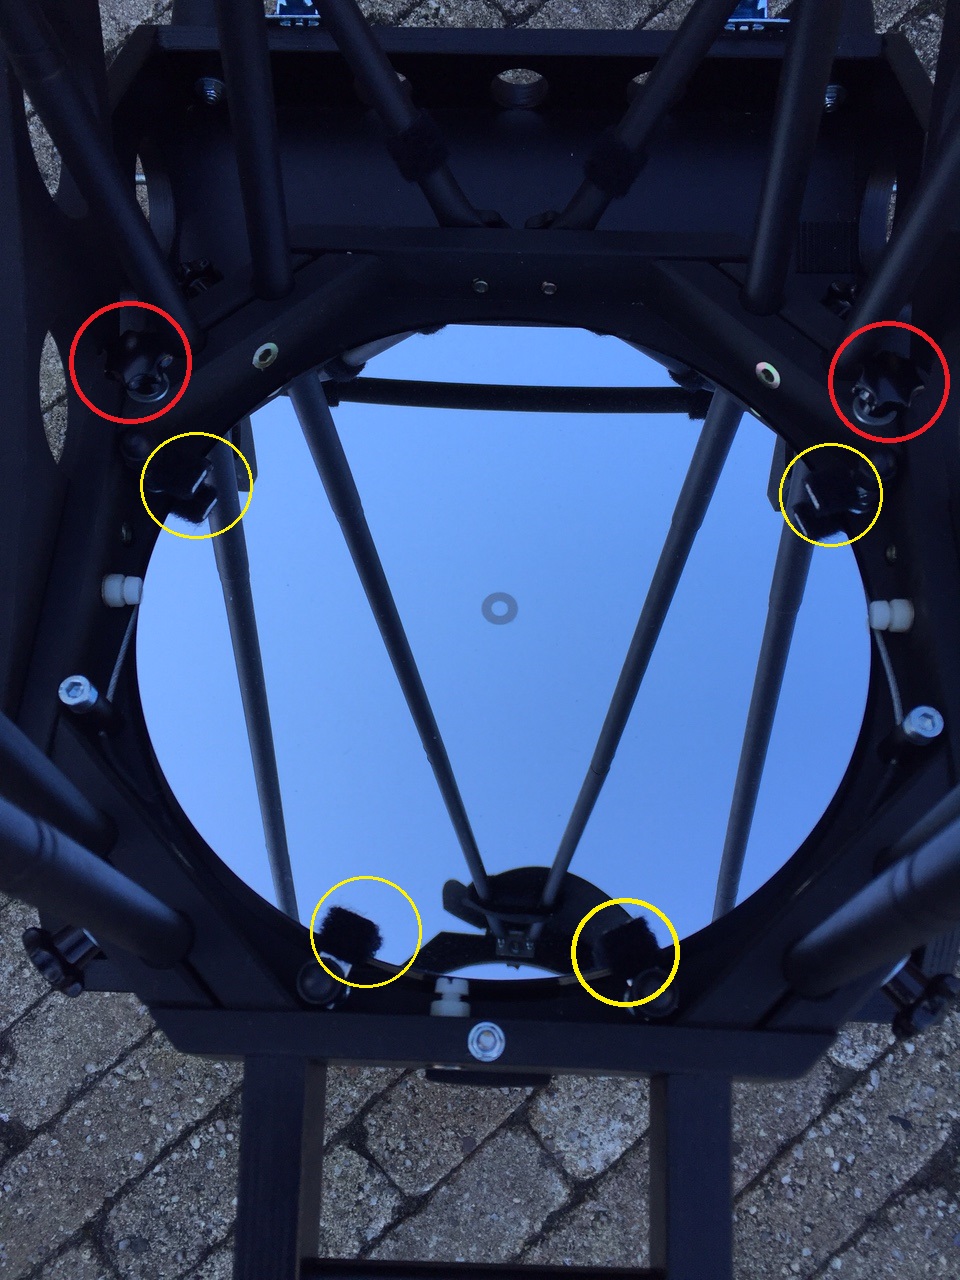
The main mirror, with red circles around the collimation screws and yellow circles around the supports (with Velcro) where the lid rests when the telescope is not in use.
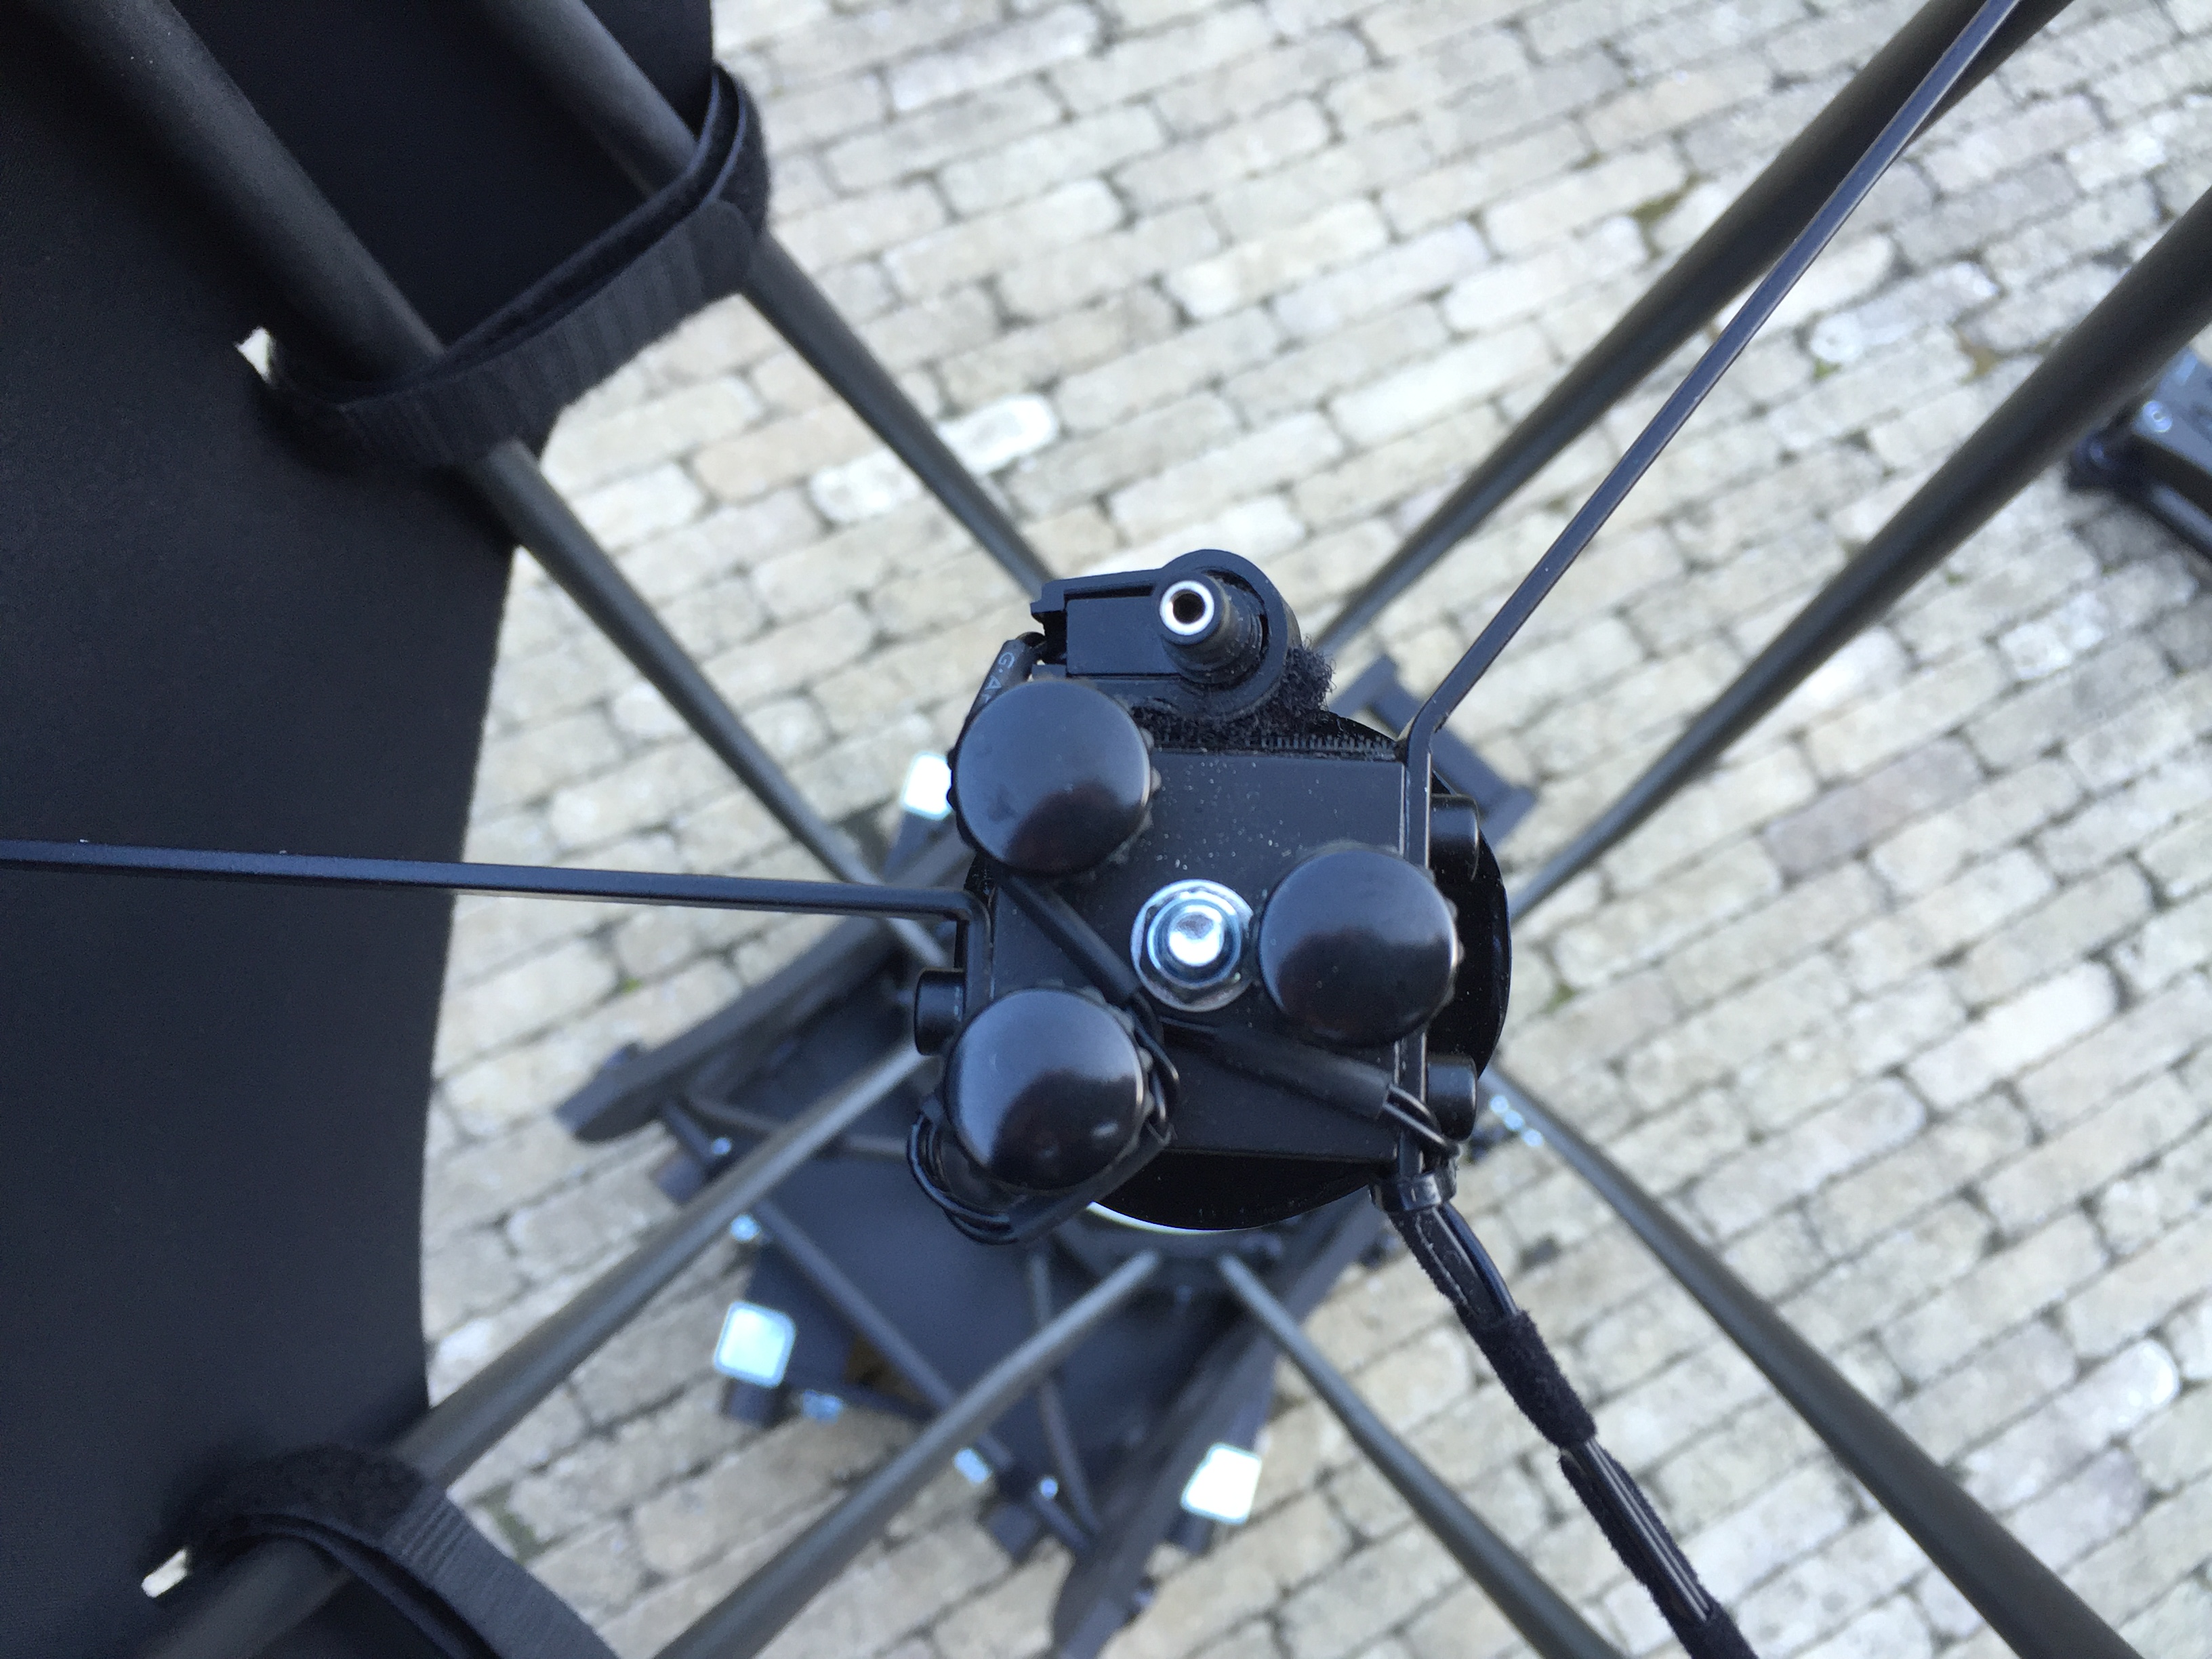
The secondary mirror mount, with the three collimation screws and three spider vanes. It shows how the wire for the mirror heating is attached. When not in use, the plug sticks to a piece of Velcro and barely blocks the light path.
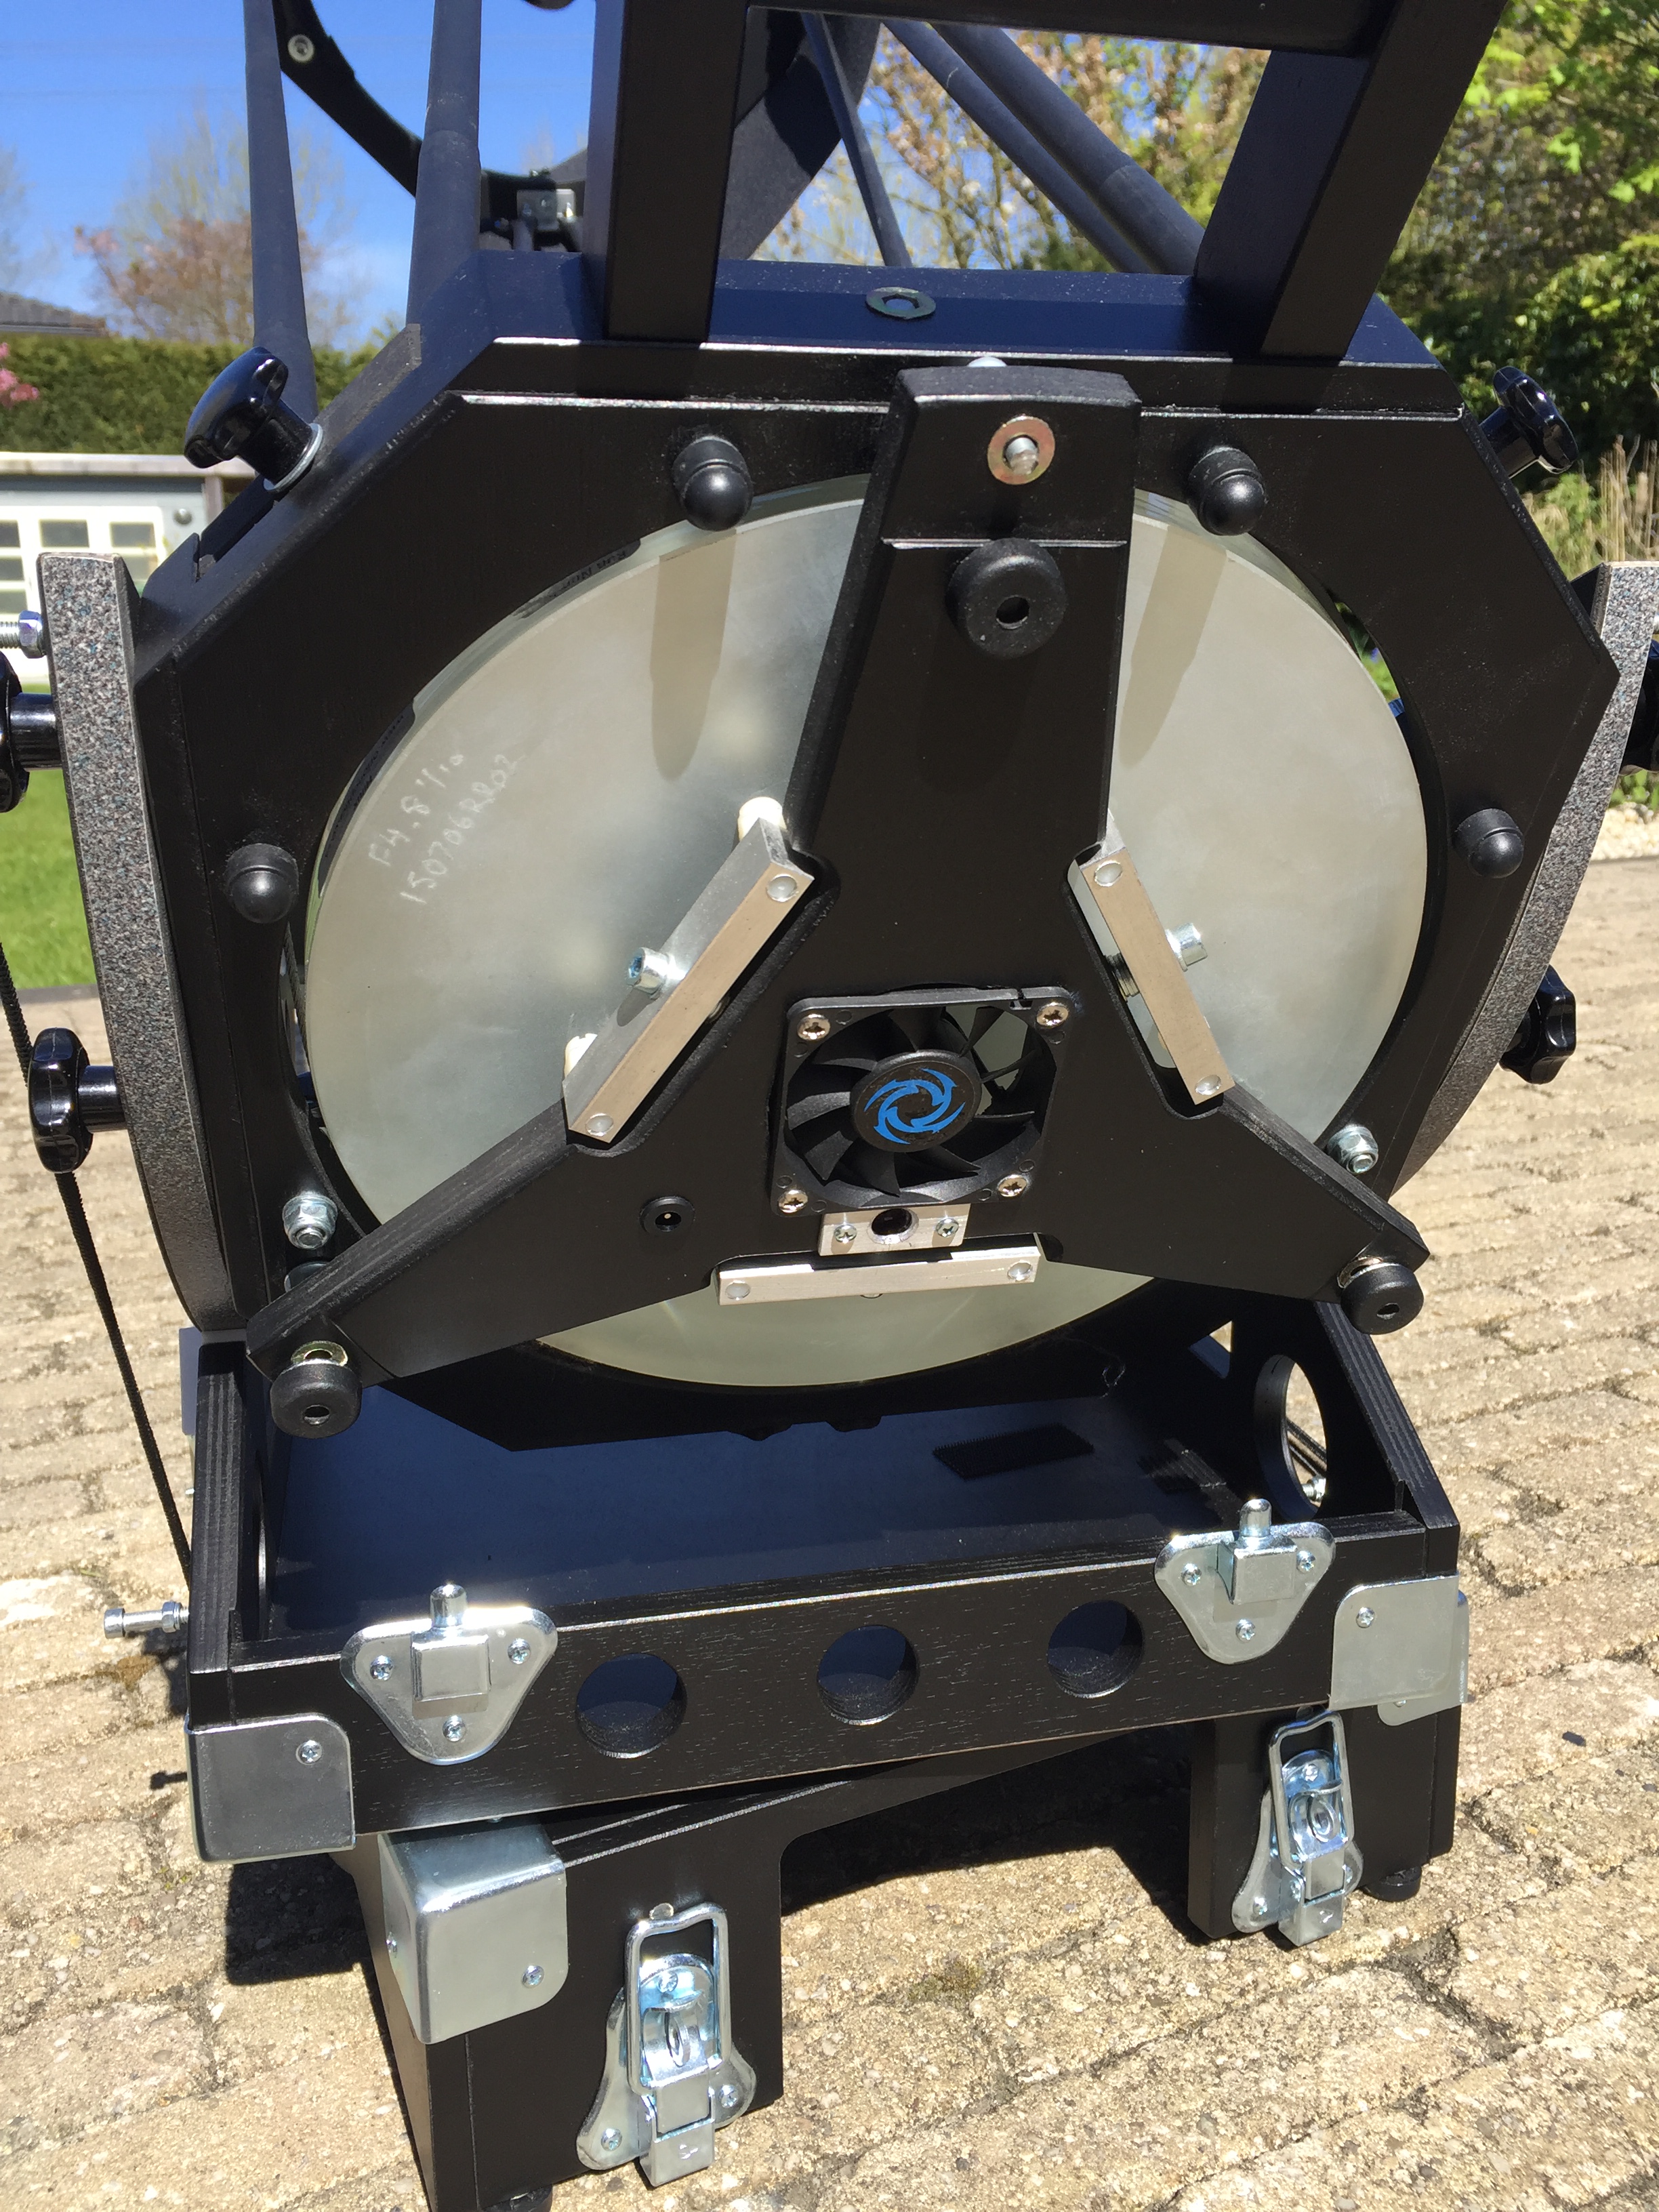
Built in the mirror cell is a fan which helps the mirror to cool down more quickly. At home I use this with a 230V adapter and in the field I use a 12V battery pack.
Handling
Now that the telescope is set up, collimated and the main mirror cooled, it’s time to start observation! Objects can be found reasonably fast using the RDF and the movement of the axes is wonderfully smooth. I can move the Alkaid perfectly by only one hand on the upper assembly, sometimes I use my other hand to rotate the telescope in azimuth with the handle that is fixed to the bottom. Only a small force is needed to bring the scope in motion. And what may be even more important: the movement is smooth and stops without any oscillation. Nothing is as frustrating as an object that has been located but disappears from view as soon as you let go of the telescope.
Disadvantages of the Sumerian Alkaid
So, is this the best telescope that money can buy for its purpose and are there no disadvantages at all? Well, it comes close, but there are also a few drawbacks: When observing with my previous telescope, I often used a chair. And while I can still use it, observing near horizon is not very pleasant with the Sumerian Alkaid. A collapsible camping seat or even sitting on the floor (cross-legged) now works better but obviously doesn’t contribute to the comfort.
The balance gets critical when observing below 40 degrees and keeping an object fixed is only possible when using light weight eyepieces. The balance cords do not fully compensate for this problem.
With the open design of the telescope, a disadvantage is that it’s prone to moisture. On the secondary mirror this is solved by a dew heater, which works great. But during long nights and in very humid conditions, condensation will also form on the main mirror and eliminating this is a lot harder. That’s why I decided to make a shroud from Lycra. This material is very flexible and can easily be slid around the trusses. This actually creates a tube, where moisture has no chance of accumulating on the surface of the mirror. As an added benefit, unwanted stray light and reflections are kept away and the mirror stays clear from dust and “foreign object damage”.Finally, wind is an important factor because the Sumerian Alkaid is very light , even though it has an open design (without shroud). Here a heavier setup has the advantage during moderate wind conditions.
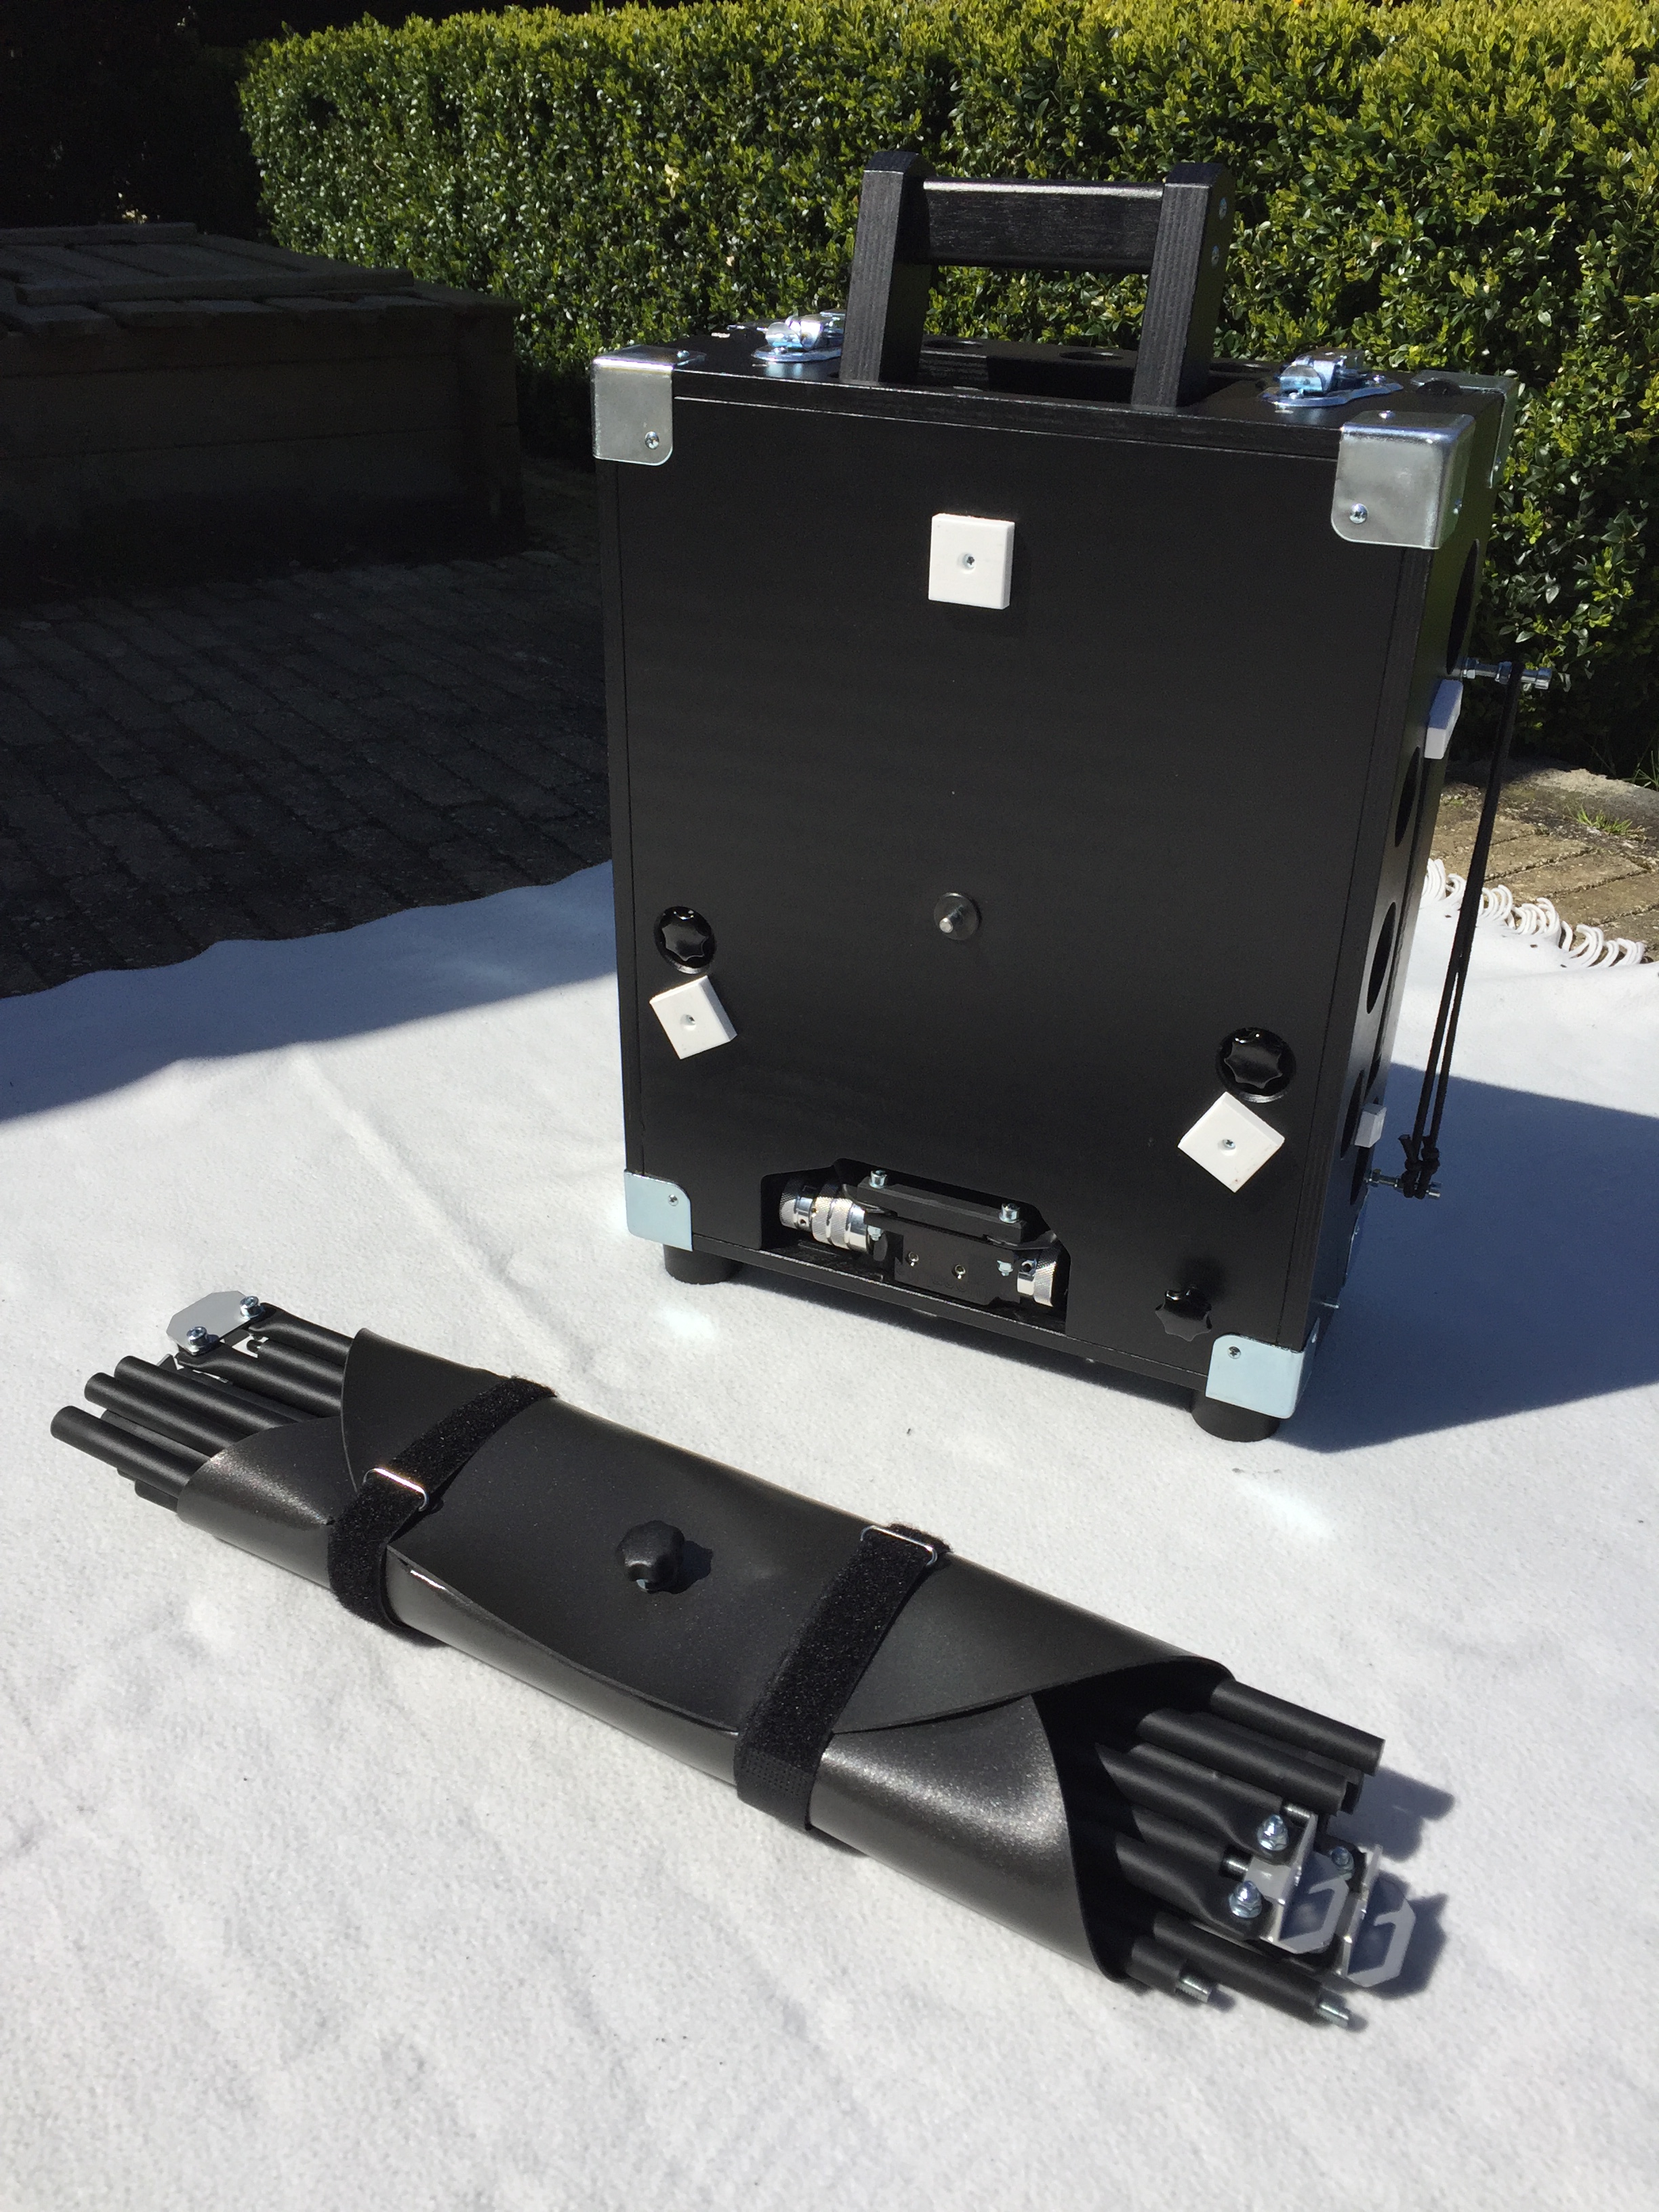
Disassembly
After observing, the Alkaid can be disassembled again to suitcase size. This is done as follows: The secondary mirror is screwed into the corner of the base. This forms the later lid of the suitcase. In the other tray, first the bananas and support rods are being placed. On top of this now comes the upper ring with focuser and RDF. Then the mirror cell with primary mirror will be placed on top. The following pictures will clarify this:

The case as shown below is snapped tight with four clips. The complete case can be lifted by the handle. The light shield can be folded around the disassembled trusses and fastened with Velcro strips:
Conclusion
The Sumerian Alkaid is the ideal companion to take with you to the world’s darkest places; with its low weight and small size it is very easy to transport this 10” workhorse anywhere you want by air. The light and open design induces sensitiveness to wind and moist and observing near horizon brings some discomfort. But I think all this stays nicely within limits.
The price may be high for the beginner who is not sure whether the hobby will last. But to the observer with some experience I can say: you get what you pay for. The Sumerian Alkaid is a very high quality instrument where attention has been paid to the smallest details. It’s ready to use in no time and works smooth and delightfull. The service level of Sumerian is good; you feel involved in every step of the way to the finished product and at any stage of the purchase.
Pls feel free to leave a comment or contact me on m.straub6@chello.nl if you have any questions. See also Sumerian Optics
What a beautiful scope. Well thought out. Great sketches, too, with detail and done in a nice style. I enjoyed comparing our views, very similar on so many ways.
Hi Norme and thanks for your comment. The 10″ Alkaid is still being used a lot for quick sessions in the garden and of course the main instrument on (air) travels. As for the sketches, the work you’re doing is great and indeed comparing is a good way to see what features look the same, what has been missed and it helps to improve your skills.
Hi Martijn,
Where were you in the photo of the directory “Who am I ?”
I suspect the french Alps…
Bertrand
Hi Bertrand,
Actually, it’s on top of the Roque de los Muchachos in La Palma at 2400 mtrs height.
I think your location should be almost as good 🙂
I also have bought this telescope, but I use the 12 inch version! I can totally agree with you, this is a cool telescope. It just works and is far superior compared with other Dobsons.